Sunday
Monday
Tuesday
Wednesday
Thursday
Friday
Saturday
lattice chicken pot pie
Mexican street corn pasta
chicken Ghiveci
creamy chicken tortilla soup, jalapeno jack popovers
butter basted ribeyes, twice baked potatoes, broccoli
brisket tacos, pinto beans
pork souvlaki, naan

Monday, December 28, 2015

Crockpot Chicken and Corn Chowder


This recipe originated from Damn Delicious, but I kept very little except the ingredients the same.  I didn't see any need to prep the bacon hours in advance, especially since whenever I cook bacon I smell bacon for hours and I want to eat everything in my sight.  I was also wary of adding cut up chicken to the crockpot, it's much easier just to shred it after it is done simmering away all day.  Chop up some carrots, onions and potatoes is all the morning prep work necessary and you come home to a warm crock of soup.  It couldn't be any easier!
Crockpot Chicken and Corn Chowder

1 pound boneless, skinless chicken breasts
12 ounces red potato, diced
½ onion, diced
3 carrots, peeled and diced
2 cups corn kernels, frozen, canned or roasted
4 cups chicken broth
1 clove garlic, minced
½ teaspoon dried thyme
½ teaspoon dried oregano
Pinch of cayenne pepper
1 bay leaf
½ teaspoon salt
¼ teaspoon pepper
¾ cup half and half
2 tablespoons cornstarch
4 slices bacon, chopped
½ cup shredded cheddar cheese

Add the chicken, potato, onion, carrots and corn to the crockpot. Stir in the broth, garlic, thyme, oregano, cayenne, bay leaf, salt and pepper. Cover and cook on low for 7 to 8 hours or high for 3 to 4 hours.

30 minutes before done, remove the chicken breasts and shred with two forks and return to the crockpot. In a small bowl, whisk together the half and half and corn starch, stir into the crockpot. Raise the heat to high if you have been cooking on low. Sauté the bacon in a small skillet over medium heat, drain. Serve, topped with bacon and cheese.
Pin It Now!

Monday, December 21, 2015

Holiday Monster Cookies


This is an update of the first ever post I made here on So Tasty, So Yummy.  I love these cookies.  They are incredibly easy to make and I think they are gluten free (I am not positive on that.)  They have no flour in them, instead they are bulked up with oats and delicious peanut butter.  The peanut butter makes them unsafe for Miss F's lunch box, but she is happy to enjoy them as an after school treat.  These cookies are best made with a stand mixer, the batter is quite stiff and the stand mixer makes it easier to stir.
Holiday Monster Cookies

½ cup butter, softened
1 cup sugar
1 cup dark brown sugar
3 eggs
4 ½ cups oatmeal (not instant)
1 ½ cups peanut butter
1 cup chocolate chips
1 cup M&Ms
1/8 tablespoon vanilla
1 teaspoon baking soda

In the bowl of the stand mixer, beat together the butter, sugar, brown sugar and eggs. Mix in the oatmeal and peanut butter until well combined. Stir in the chocolate chips and M&Ms. Drop by heaping tablespoon fulls onto Silpat lined cookie sheets. Bake for 8 to 10 minutes. Cool on the pans for 5 minutes, the remove to a wire rack to cool completely.
Pin It Now!

Thursday, December 17, 2015

Green Chile Chicken Quesadillas


I became obsessed with quesadillas in college. We would always go to La Tapatia in the middle of the night to eat, since it was open until 3 am.  Tapatia has gotten a lot fancier since my college days.  I had to learn to order (pechuga de pollo quesadilla) in order to not get shredded chicken in my quesadillas. I much prefer bite sized pieces of chicken breast in my quesadilla instead of shredded chicken.  Miss F inhaled these quesadillas...she was "starving!"  I was shocked that she didn't comment on the green chiles in them.  And my family devoured the entire platter! 
Green Chile Chicken Quesadillas

1 tablespoon vegetable oil
2 boneless skinless chicken breasts
½ teaspoon cumin
½ teaspoon salt
1 can diced green chiles (4.5 ounces)
12 flour tortillas
2 cups shredded Colby jack cheese


Heat the oil in a large skillet over medium high heat. Cut the chicken into bite sized pieces and toss with the cumin and salt. Sauté the chicken and chiles for 5 minutes, until the chicken is cooked through. Remove the chicken and chiles from the pan, wipe down the pan. Place one tortilla in the pan over medium heat and sprinkle with 3 tablespoons of the cheese. Place 1/6 of the chicken and chiles over top, then top with another two tablespoons of cheese. Place a second tortilla on top and cook for 2 minutes. Flip over and cook for 2 minutes more. Repeat with the remaining cheese, chicken and tortillas. Cut into quarters and serve with sour cream, salsa and guacamole.
Pin It Now!

Monday, December 14, 2015

Cider Brined Pork Loin


I always make a crockpot of apple cider for Thanksgiving. C always makes fun of me because it is usually only his mom and I drinking it. I always have a ton leftover, but this year was even more than normal since my mother-in-law didn't join us for dinner. So, I perused the internet to find ways to use it beyond my normal apple cider pancakes (which I made a couple times.)  This recipe was inspired by Bon Appetit, but I made a ton of changes.  This is a fantastic one pot meal, perfect for winter.
Cider Brined Pork Loin

2 cups apple cider, divided
2 tablespoons kosher salt
2 tablespoons brown sugar
1 bay leaf, torn into small pieces
½ teaspoon whole black peppercorns

1 cup apple cider
½ teaspoon cornstarch
1 teaspoon water

1 (2 pound) center-cut boneless pork loin roast
1 clove garlic, minced
1 teaspoon chopped fresh rosemary
½ teaspoon kosher salt
¼ teaspoon freshly ground black pepper
2 tablespoons extra virgin olive oil, divided
1 pound carrots, peeled and chopped
1 pound fingerling potatoes, halved
½ small onion, chopped

In a small saucepan, bring 1 cup cider, salt, brown sugar, bay leaf and peppercorns to a boil. Removed from the heat and stir in 2 cups water and 1 cup cider. Cool to room temperature. Place the pork loin in a 1 gallon plastic bag, pour the brine over and seal the bag. Refrigerate overnight.

Preheat the oven to 325 degrees. Bring 1 cup cider to a boil over medium high heat. Cook until reduced to ¼ cup, about 10 minutes. Stir in the corn starch and water.

Remove the pork from the brining liquid. Rub the garlic, rosemary, salt and pepper over the pork. Heat 1 tablespoon of the oil in a ovenproof skillet over medium high heat. Sear the pork on all sides, about 5 minutes per side. Brush the pork with the cider reduction. Toss the carrot, potatoes and onions with the remaining oil, salt and pepper to taste. Add the carrot, potatoes and onions to the pan with the pork. Place it in the oven and roast for 15 minutes. Brush again with the cider reduction and roast 20 minutes more, until the pork reaches a temperature of 140 degrees. Remove the pork from the oven and tent with foil on a plate. Return the carrot, potatoes and onions to the oven, increase the temperature to 400 degrees and roast for 15 minutes more, while the pork is resting. Slice the pork and serve with the carrot, potatoes and onions.
Pin It Now!

Thursday, December 10, 2015

Emeril’s Shrimp Creole


Miss F liked this meal so much, she requested it for the next trip C had out of town. The use of fresh tomatoes really amps up my usual Shrimp Creole recipe. I have been making Shrimp Creole for years, but always with tomatoes from a can. Making it with fresh tomatoes is about a million times better.  Miss F inhaled her shrimp.  She also doused hers in lots of Tabasco sauce, such a smart kid.  The sauce is so rich and tastes as if it has been cooking for hours.  In reality, this meal comes together incredibly quickly.  It is going to be in our standard daddy is out of town rotation.
Emeril’s Shrimp Creole

¼ cup butter
1 cup chopped onions
1 cup chopped green bell peppers
½ teaspoon salt
1/8 teaspoon cayenne
1 bay leaf
1 pound peeled, seeded and chopped tomatoes
1 ½ teaspoons minced garlic
Dash of Worcestershire Sauce
Dash of hot sauce
1 tablespoon all-purpose flour
½ cup water
1 pound of large shrimp, peeled, tail-off, and deveined
1 teaspoon Cajun seasoning
2 cups cooked long-grain white rice

In a large sauce pan, melt the butter over medium heat. Add the onion and bell peppers to the pan, season with salt and cayenne; sauté for 6 to 8 minutes. Stir in the bay leaf, tomatoes and garlic. Bring to a boil, then reduce to a simmer. Simmer for 15 minutes, add water if needed. Add the Worcestershire and hot sauce. Whisk the flour and water together in a small bowl, stir into the tomato mixture and cook for 5 minutes more. Season the shrimp with the Cajun seasoning and add to the pan, cook for 5 minutes more. Serve over rice.
Pin It Now!

Monday, December 7, 2015

Parmesan Pepper Popovers


These popovers were such a hit, that I made them twice in one week. C has started expecting some sort of homemade bread every meal. Miss F has also really turned into a carb lover. Apparently, six popovers aren't enough for one dinner. I know I only ate one. The second night I made these, I doubled the recipe and was able to enjoy a few leftover.  The puff up so beautifully,  they are the perfect side for a warm bowl of soup in the winter.  We had them with soup, salad and butter.  Lots of butter.  I believe we went through nearly a whole stick of butter in just a couple days.  It's the holiday season...so treat yourself!
Parmesan Pepper Popovers

1 cup milk
2 eggs
1 cup flour
½ teaspoon salt
¼ teaspoon fresh ground black pepper
2 tablespoons Parmesan cheese

Preheat the oven to 450 degrees. Grease a 6 cup popover pan and place in the oven while it preheats. In a large bowl, whisk together the milk and eggs until well blended. Add the flour, salt, pepper and Parmesan; stirring well to combine. Remove the pan from the oven and carefully fill the cups with the batter. Bake for 20 minutes, then lower the temperature to 350 degrees and bake for 15 to 20 minutes more, until golden brown.
Pin It Now!

Thursday, December 3, 2015

Chicken Lo Mein with Vegetables


I love cooking lo mein, as a kid, I hated rice. So whenever my mom would make a stir fry of any kind, I would boil up a pot of ramen to serve with mine, so that I didn't have to have the rice. I now love rice, but I am still a noodle girl at heart. One of my favorite snacks to this day is drained ramen tossed with lite soy sauce. I used to have it after school all the time, it is a comfort food for me. Miss F loves lo mein, but we couldn't get her to try the mushrooms, she was happy to send hers over my way.  This dish is heavy on vegetables, there are more veggies than there are noodles.  Which makes it tasty and a bit healthy.  Nice to have after days of turkey, gravy, butter and pie!
Chicken Lo Mein with Vegetables

1 tablespoon cornstarch
1 teaspoon minced ginger
1 teaspoon Sriracha
¼ cup soy sauce
½ cup chicken broth
8 ounces uncooked Asian noodles
1 tablespoon canola oil
2 boneless, skinless chicken breasts, thinly sliced
½ pound mushrooms, sliced
¼ pound snow peas
1 large red bell pepper, julienned
½ cup carrots, julienned
1 teaspoon sesame seed oil

In two cup measure, whisk together the cornstarch, ginger, Sriracha, soy sauce and chicken broth. Prepare the noodles per package instructions, drain and set aside. Heat the oil in a large skillet or wok over medium-high heat. Stir fry the chicken, mushroom, snow peas, bell pepper and carrots for 3 to 5 minutes. Pour the broth mixture over the chicken and vegetables, bring to a boil and cook for a minute more. Add the noodles and sesame oil, toss well to coat completely. Serve.
Pin It Now!

Monday, November 30, 2015

Crispy Shrimp Tacos


Whenever C is out for the evening, Miss F and I are usually going to enjoy some sort of seafood dish. Last time she requested shrimp tacos, but the crispy kind. I don't think I have ever made crispy shrimp tacos and I am fairly certain she has never had them out, so I am not sure where she got the idea, but it was a great one. Especially when we topped them with her favorite "green sauce" aka sour cream, tomatillo salsa and lime juice.  She ate her without the cabbage and avocado, but she did add some black beans to her tacos.
Crispy Shrimp Tacos

2 tablespoons flour
1 teaspoon chipotle chili powder
¼ teaspoon salt
1 pound peeled and deveined shrimp, tails removed
2 tablespoons butter
2 tablespoons vegetable oil

½ cup sour cream
½ cup tomatillo salsa
Juice from one lime

1 ripe avocado, peeled and sliced
1 cup shredded purple cabbage
8 flour tortillas, warmed

Whisk together the flour, chile powder,and salt together in a small bowl. Add it to a resealable plastic bag. Add the shrimp to the bag, toss well to make sure they are evenly coated. Heat the butter and oil over medium heat in a large skillet. Cook the shrimp for 4 to 5 minutes, turning halfway through, until cooked through.

In a small bowl, whisk together the sour cream, salsa and lime juice. Salt to taste. Serve the shrimp in flour tortillas with sour cream tomatillo sauce, avocado and cabbage.
Pin It Now!

Monday, November 23, 2015

Steak and Green Bean Stir Fry


This was inspired by a Cooking Light recipe, but in the end, was very little like its original. Miss F was obsessed with the steak. Even though she insisted that it wasn't steak, it was beef. We tried over and over again to explain to her that steak is beef, but she was insistent that it wasn't. She devoured her whole plate, green beans rice and all. She also covered it with Sriracha, she has always loved spicy foods, but she has gotten even more adventurous with spicy foods, especially Sriracha. 
Steak and Green Bean Stir Fry

¼ cup unsalted chicken broth
1 tablespoon oyster sauce
2 tablespoons lower-sodium soy sauce
2 teaspoons grated peeled fresh ginger
2 teaspoons minced garlic
1 teaspoon Sriracha
1 teaspoon cornstarch
1 tablespoon vegetable or canola oil
12 ounces boneless sirloin steak, cut into 1/4-inch strips
1 cup chopped green beans
½ onion, sliced

In a two cup measure, whisk together the broth, oyster sauce, soy sauce, ginger, garlic, Sriracha and corn starch. Set aside. Heat the oil in a large skillet or wok, swirl to coat. At the beef, green beans and onion, stir fry for 2 minutes. Add the broth mixture to the pan and cook for 3 minutes, until the sauce is thickened. Serve over rice.
Pin It Now!

Thursday, November 19, 2015

Poblano Shrimp Pasta


Whenever C goes out of town, Miss F and I indulge in seafood of some variety. Her favorite is shrimp, by far. She can eat more fried shrimp than anyone I know, she is a machine. Luckily, she also loves shrimp prepared in other ways. She and I really enjoyed this pasta, which was loosely based on a Rachael Ray recipe. It comes together incredibly quickly, dinner is truly ready in the time it takes to cook the thin spaghetti, which isn't long at all.
Poblano Shrimp Pasta

1 pound pasta, I used thin spaghetti
3 tablespoons butter
1 pound medium shrimp, deveined, shelled and tails removed
1 small poblano pepper, seeded and finely chopped
1 small onion, chopped
4 cloves garlic, minced
3 tablespoons flour
1 cup chicken broth
1 cup cream

Prepare the pasta per package instructions, drain and set aside.

Melt the butter in a large skillet. Add the shrimp, poblano, and onion. Saute for 5 to 8 minutes, until the shrimp are cooked through. Add the garlic and sauté for 30 seconds more. Stir in the flour and cook for a minute more. Slowly whisk in the chicken broth and cream, bring to a simmer and reduce the heat to low. Simmer for 3 minutes more, add the drained pasta and toss well to coat, salt and pepper to taste. Serve.
Pin It Now!

Monday, November 16, 2015

Apple Pie


I have been on the quest for the perfect apple pie recipe for the longest time. I love Martha Stewart's crust recipe, but I have never been thrilled with any of the pie fillings I have tried.  I really liked the results from using Gala apples.  I usually like a tart apple, like Granny Smith, in my apple desserts, but the Gala apples cooked beautifully.  This pie is spectacular on its own, but even better with a scoop of vanilla ice cream.  Perfect for fall and even more perfect for your Thanksgiving table. 
Apple Pie

Crust:
2 ½ cups flour
1 teaspoon salt
1 cup butter, cold, cut into small pieces
¼ to ½ cup ice water

Filling:
3 pounds Gala apples, peeled, cored and sliced
½ cup sugar
¼ cup brown sugar
¼ cup flour
1 teaspoon cinnamon
juice from ½ lemon
2 tablespoons butter

2 tablespoons cream

In the bowl of a food processor, combine flour and salt; pulse to combine. Add the butter, and pulse until mixture resembles coarse crumbs with some larger pieces remaining, about 10 seconds.

With the machine running, add the ice water through the feed tube in a slow, steady stream, just until the dough holds together without being wet or sticky. Do not process more than 30 seconds. Test by squeezing a small amount of the dough together; if it is still too crumbly, add a bit more water, 1 tablespoon at a time.

Turn out the dough onto a clean work surface. Divide in half, and place each half on a piece of plastic wrap. Shape into flattened disks. Wrap in plastic, and refrigerate at least 1 hour or overnight. The dough can be frozen for up to 1 month; thaw overnight in the refrigerator before using.

Preheat the oven to 400 degrees. Roll out both refrigerated dough disks into a 12 inch circle. Place one into a 9 inch pie pan, trim the crust ½ inch from the sides.

Stir together the apples, sugar, brown sugar, flour and cinnamon. Add the apples to the pie pan. Cut the butter into ¼ inch cubes, dot the apples with the butter pieces. Cut the remaining dough into 1 inch strips, weave a lattice top onto the pie. Brush the top with the cream.

Bake the pie for 15 minutes, reduce the oven temperature to 350 degrees and bake for 40 minutes more. Serve warm with vanilla ice cream.
Pin It Now!

Thursday, November 12, 2015

Tomatillo Chicken Enchiladas


I have been obsessed with tomatillo salsa lately. I always seem to have a jar lurking in our fridge. I took my usual white chicken enchilada recipe and adapted it to include the leftover tomatillo salsa I had. If I hadn't, I would have eaten my weight in chips and salsa. These enchiladas are super simple and come out perfectly. Miss F and I are huge fans, C isn't as enthusiastic.  I can admit fully that I polished off the entire pan for lunch the next day.  I just heated them up straight in the pan and ate them all.  Oink oink.
Tomatillo Chicken Enchiladas

12 corn tortillas
2 cups cooked, shredded chicken
2 cups shredded Cheddar Jack cheese
3 tablespoons butter
3 tablespoons flour
2 cups chicken broth
1 cup sour cream
½ cup tomatillo salsa (or your favorite salsa verde)

Preheat the oven to 350 degrees. Spray a 9x13 pan with cooking spray. Wrap the tortillas in a damp paper towel and microwave for 40 seconds. Mix the chicken with 1 cup of the cheese. Place a couple spoon fulls of the chicken mixture in each tortilla, roll up and place in the prepared pan.

In a sauce pan, melt the butter over medium heat. Whisk in the flour and cook for a minute or so, whisking the whole time. Whisk in the broth and cook 1 minute. Add broth and whisk until smooth, heat for 5 minutes until thick and bubbly. Remove from the heat and stir in the sour cream and salsa. Pour the sauce over the rolled tortillas and top with the remaining cheese. Bake for 20 minutes, then turn on the broiler and broil for 3 minutes or so to brown the cheese. Serve.
Pin It Now!

Monday, November 9, 2015

Baked Sour Cream Chocolate Doughnuts


I love baking doughnuts. It really doesn't take too terribly long, especially if I use my mini-doughnut pans.  Whenever I make these on the weekend, I never have a single doughnut leftover.  Miss F and C usually take down two pans worth in one sitting...then proceed to complain that they ate too many doughnuts.  On a weekday, I always have some leftover, which makes for great grab and go breakfasts during the week.  This recipe is from the Semisweet Sisters.
Baked Chocolate Sour Cream Doughnuts

½ cup sour cream
1 large egg
1 teaspoon vanilla extract
¼ cup vegetable oil
½ cup sugar
¾ cup all purpose flour
¼ cup cocoa powder
½ teaspoon baking soda
¼ teaspoon salt

Preheat the oven to 350 degrees. Grease a doughnut pan with cooking spray. In a large bowl, whisk together the sour cream, egg, vanilla, oil and sugar. Stir in the flour, cocoa, baking soda and salt until well combined. Fill the pan with the batter and bake for 10 to 12 minutes. Cool in the pan for 5 minutes, then transfer to a wire rack to cool completely.
Pin It Now!

Thursday, November 5, 2015

Crockpot Rosemary Chicken with Butternut Squash


I like to have butternut squash at least once a week in the fall. It is one of my most favorite vegetables and even though it is still in the 80s here, it still makes it feel a bit more like autumn.  Miss F firmly rejects butternut squash, even though I involved her in the prep of this meal.  She ate a ton of green beans and chicken, only trying the tiniest bite of squash.  This is the perfect fall meal.  I adapted the recipe from GI 365.
Crockpot Rosemary Chicken with Butternut Squash

3 tablespoons butter
3 tablespoons flour
½ cup chicken broth
½ cup milk
1 large butternut squash, peeled and seeded
1 small onion, chopped
1½ pounds chicken thighs
1 tablespoon minced rosemary
2 teaspoons Kosher salt
Parmesan, for serving

Melt butter in a saucepan over medium-low heat. Stir in flour; keep stirring until smooth and bubbly. Remove from heat and add the chicken broth and milk, a little at a time, stirring to keep smooth. Return to heat. Bring sauce to a gentle boil; cook, stirring constantly, until it thickens

Cube the butternut squash into 1 ½ inch chunks. Add the squash and onion to the crockpot, top with the chicken thighs. Pour the broth and milk mixture over top, then sprinkle with the rosemary and salt. Cover and cook on low for 8 hours. Serve topped with grated Parmesan.
Pin It Now!

Monday, November 2, 2015

Garlic Fat Bread


So one of the best foods in life is fat bread. I can usually try and force it to go with whatever dinner I am serving, but sometimes, you have to have plain garlic bread. And when you want garlic bread, why not invent garlic fat bread?  My little family of three nearly devoured this entire platter.  I may have snuck a slice or two more around 11 pm.  And then C was all upset the next day because we didn't have much leftover.  That is how popular fat bread, and now garlic fat bread, are.  Serious deliciousness.
Garlic Fat Bread

1 loaf French bread
½ stick softened butter
2 teaspoons garlic powder
3 ounces grated Parmesan cheese
3 ounces grated Mozzarella

Slice the bread lengthwise. Mix the butter and the garlic powder; spread over each cut side of the bread. Sprinkle the Parmesan and Mozzarella cheese over the butter. Place under the broiler until slightly brown and heated through.
Pin It Now!

Thursday, October 29, 2015

Guinness Beer Bread


I was making Crockpot Guinness Beef Stew and had a fair amount of beer leftover. I figured it wouldn't be the best idea to down the rest of the beer at 8 in the morning, so I decided to bake bread with it.  The bread was so easy, no rise time necessary!  You have fresh baked bread in about an hour, which is the best thing about beer bread.  Miss F was wary of the bread, but once she slathered it in butter, she was sold.  This recipe is adapted from The Black Peppercorn.
Guinness Bear Bread

3 cups flour
½ teaspoon salt
4 teaspoons baking powder
⅓ cup oats
⅔ cup dark brown sugar
12 ounces Guinness
1 tablespoon oats

Preheat the oven to 350 degrees. Grease a loaf pan and set aside. Whisk together the flour, salt, baking powder, 1/3 cup oats and brown sugar. Slowly beat in the Guinness, do not overmix the batter and make sure there aren’t any lumps. Pour the batter into the prepared pan and sprinkle the tablespoon of oats on top. Bake for 45 to 50 minutes, until an inserted toothpick comes out clean. Cool on a wire rack.
Pin It Now!

Monday, October 26, 2015

Crockpot TexMex Chicken Stew


One of Miss F's most favorite meals is crockpot chicken enchilada soup. She requests it nearly weekly.  I adapted this recipe from Tracey's Culinary Adventures, but Miss F insisted it was just crockpot chicken enchilada soup, which was quite fine by her.  This recipe was much easier than her favorite, you don't really have to bother with much before it all goes into the crockpot to simmer all day.  I am going to use the trick of microwaving the onions in other crockpot meals, it was a really easy step, but yielded great results.
Crockpot Tex Mex Chicken Stew

½ onion, chopped
2 garlic cloves, minced
1 tablespoon tomato paste
1 teaspoon canola oil
1 teaspoon chili powder
2 cups chicken broth
1 (14.5 oz) can Rotel
2 tablespoon corn starch
1 ½ teaspoons light brown sugar
2 cups frozen corn
1 (14.5 ounce) can of black beans, rinsed and drained
1 ½ pounds boneless, skinless chicken thighs, trimmed
1 chipotle chile in adobo sauce, minced
1 avocado, pitted and sliced

Stir together the onion, garlic, tomato paste, oil and chili powder in a microwave safe dish. Microwave for 2 minutes, stirring halfway through. Transfer the mixture to the crockpot. Whisk together the broth, Rotel, corn starch and brown sugar; pour into the crockpot. Add the corn and beans to the crockpot, stir to combine. Salt and pepper the chicken thighs, add to the crockpot. Cover and cook on low for 4 to 6 hours. Remove the chicken from the crockpot, shred with two forks and return it to the crockpot. Stir in the chipotle chile, season to taste with salt and pepper. Serve, topped with avocado slices.
Pin It Now!

Thursday, October 22, 2015

Baked Steelhead Trout


Miss F first had trout at a restaurant on the Wolfgangsee in Austria. She also had a char that she loved even more.  I took her to the grocer with me and was pleased to see that they had both Rainbow trout and steelhead trout available.  I let Miss F make the choice and she opted for the steelhead.  This portion was mine and I fully figured to eat the leftovers from Miss F, but it turns out, there were none.  She inhaled the fish!  This recipe couldn't be any easier and it resulted in a perfectly cooked fish. It would be equally delicious with char or salmon.  I love that Miss F loves seafood as much as I do, I just wish we could have it more often.

Baked Steelhead Trout

4 steelhead trout filets
2 tablespoons butter, melted
1 small lemon
1 teaspoon parsley

Preheat the oven to 450 degrees. Line a baking sheet with aluminum foil and place the filets on it. Stir together the butter, juice of half the lemon, 1 teaspoon of lemon zest and the parsley. Brush the butter over each filet, salt and pepper to taste. Roast for 12 to 15 minutes. Squeeze the remaining lemon half over the filets and serve.
Pin It Now!

Monday, October 19, 2015

Crockpot Bolognese Sauce


I had planned to make my usual Bolognese, but our life had other plans.  There was just no way to make the cook time work with our schedule.  We had a house showing and not enough time to get the sauce made, not to mention we had a huge TexMex lunch.  So Bolognese was pushed off until the next day, which necessitated finding a recipe for the crockpot...and one that also aligned well with the ingredients I had purchased for my usual recipe.  I used a Skinnytaste recipe as my inspiration, but I made quite a few changes.  It was a huge hit and I loved that it simmered in the crockpot all day instead of simmering on the stove for a couple hours...much easier for me.
Crockpot Bolognese Sauce

3 slices bacon, cut into lardons
½ white onion, minced
2 carrots, minced
1 tablespoon tomato paste
1 pound lean ground beef
¼ cup white wine
1 - 28 oz can crushed tomatoes
1 bay leaf
salt and fresh cracked pepper
¼ cup half & half

In a skillet, cook the bacon on low heat until crisp, about 5 minutes. Add onions and carrots, cook on medium low until soft, about 5 minutes more. Add the tomato paste, sauté for one minute more. Increase the heat to medium-high, add the ground beef and sauté until browned. Drain off the fat, then add the wine, cook for 3 minutes more. Add the meat mixture to the crockpot, along with the tomatoes and bay leaf. Stir to combine, salt and pepper to taste. Cover and cook on low for 6 hours. Stir in the half and half, taste and add any additional salt and pepper needed, then serve over pasta.
Pin It Now!

Thursday, October 15, 2015

Cream of Crab Soup


C was gone for a week on business. While he was enjoying meals at Babbo, Le Bernadin and Bagatelle, not to mention a couple days at The Cloister at Sea Island, we had seafood week.  We had lobster carbonara, trout, crab melts and slow baked salmon.  But the best night was the one we celebrated my mom's birthday.  I would usually get the crab meat for cooking from them, so I would know it was fresh picked, but that didn't seem quite right to do for her birthday.  The Costco crab worked great, though it wasn't quite as tasty as the Texas blue crab that we pick.  This recipe is adapted from Old Bay. 
Cream of Crab Soup

¼ cup butter
1 small onion, coarsely chopped
¼ cup flour
4 cups half-and-half
1 tablespoon Old Bay Seasoning
½ teaspoon parsley
1 pound lump crabmeat
3 tablespoons dry sherry

Melt butter in 3-quart saucepan on medium heat. Add onion; cook and stir 5 minutes or until softened. Add flour, Old Bay and parsley; whisk until well blended. Whisking constantly gradually add milk. Bring just to boil.

Stir in crabmeat. Reduce heat to low; simmer 20 minutes stirring occasionally.

Stir in the sherry. Heat for 1 to 2 minutes. Sprinkle with additional Old Bay if desired.
Pin It Now!

Monday, October 12, 2015

Crockpot Guinness Beef Stew


I am doing a fantastic job imagining it's fall around here. Even though the thermostat reads in the 90s. And I am pretty sure that after we close on our new house this week, we will go swimming in the pool this weekend.  Crockpot stew is an easy way to pretend it's fall.  I loved making it in Aspen, it was perfect to come home to after a day of skiing.  Though here in Houston, it is more like a day of swimming, in October.  I adapted this recipe from Blissfully Delicious.
Crockpot Guinness Beef Stew

1 pound stew beef
¼ cup flour
2 teaspoons vegetable oil
½ onion, chopped
1 cup chicken broth
¾ cup Guinness Draught
2 tablespoons tomato paste
1 tablespoon light brown sugar
½ teaspoon dried thyme
1 bay leaf
5 carrots, peeled and cut into 1-inch chunks
1 russet potato, peeled and cut into 1-inch chunks
4 mushrooms, quartered
2 cups frozen peas
¼ cup unbleached all-purpose flour

Toss the stew beef with the flour, turning well to coat. Heat the oil in a large skillet over medium heat, add the beef and crown on all sides. Transfer the beef to the crockpot. Add the onions to the skillet and cook for 5 minutes. Add the broth, Guinness, tomato paste, sugar, thyme and bay leaf. Bring to a simmer and scrape up any browned bits from the bottom of the skillet. Transfer the skillet contents to the crockpot and add the carrots, potatoes and mushrooms. Cover and cook on low for 8 to 10 hours, stir in the peas for the last 20 minutes of cook time. Season with salt and pepper to taste, serve.
Pin It Now!

Thursday, October 8, 2015

Banana Chocolate Chip Muffins


No matter what, I always end up with over ripe bananas on our counter.  Once they get too far gone to eat, they go straight into the freezer so that I can use them later for baked goods.  Miss F went crazy for these treats, having them for breakfast and in her snack bag for school.  There is no mixer needed, so she was able to make them nearly entirely herself.  We are still working on dishing the batter into the muffin cups, it is an acquired skill.  These muffins were adapted from Taste of Home.
Banana Chocolate Chip Muffins

3 medium ripe bananas
1 egg
1/3 cup vegetable oil
1 teaspoon vanilla extract
1 ½ cups all-purpose flour
1 cup sugar
1 teaspoon baking soda
½ teaspoon salt
½ cup chocolate chips

Preheat the oven to 375 degrees. In a large bowl, mash the bananas with the egg, oil and vanilla. Stir in the flour, sugar, baking soda and salt, just until moistened. Fold in the chocolate chips. Fill 12 paper lined muffin cups. Bake for 18 to 22 minutes, cool for 10 minutes, then remove from pan and cool completely on a wire rack.
Pin It Now!

Monday, October 5, 2015

Citrus Chicken Thighs


I made quite a few changes from the original recipe so that I could roast potatoes and broccoli along with the chicken thighs.  Miss F had fun squeezing the citrus and she was a big fan of the chicken, as long as hers didn't have any scallions on it.  I roasted the fingerling potatoes in the same pan as the chicken, which provided a nice brightness to them.  It would also work well with carrots in the same pan.  This chicken would also be great on the grill, as long as it is still grilling weather where you are. 
Citrus Chicken Thighs

1 bunch scallions, thinly sliced
2 garlic cloves, chopped
1 teaspoon finely grated lime zest
1 teaspoon finely grated orange zest
¼ cup fresh lime juice
¼ cup fresh orange juice
¼ cup reduced-sodium soy sauce
2 tablespoons vegetable oil
1 tablespoon kosher salt
2 pounds skin-on, bone-in chicken thighs

Set aside ¼ cup sliced scallions. Pulse the garlic, citrus zests, citrus juices, soy sauce, oil, salt, and remaining scallions in a food processor until well combined. Set aside ¼ cup of the marinade; place remaining marinade in a large resealable plastic bag. Add chicken, seal bag, and turn to coat. Chill at least 20 minutes. Preheat the oven to 400 degrees. Spray a 9x13 baking dish with cooking spray and place the chicken in a single layer in the dish. Bake for 35 to 40 minutes. Serve the chicken with the reserved scallions and marinade.
Pin It Now!

Thursday, October 1, 2015

Roasted Parmesan Butternut Squash


Anyone else out there already thinking of Thanksgiving? If everything works out, we will be in our new home for turkey day this year. And I am so excited because the new house has DOUBLE OVENS. No more crazy rotation schedule while trying to roast a turkey, bake rolls and bake side dishes. There will be room for everything and everything will be cooked at its proper temperature, not some compromised temperature I had to settle for to make everything work. This butternut squash dish from Gourmet is going on my Thanksgiving Day menu. It is incredibly easy to prepare and it tastes like you slaved over it.  The squash can be chopped a day in advance and kept in the fridge until ready to bake.
Roasted Parmesan Butternut Squash

3 pound butternut squash, peeled and cut into 1-inch pieces
½ cup heavy cream
3 sage leaves
¾ cup finely grated Parmesan
1 teaspoon salt
¼ teaspoon pepper

Preheat the oven to 400 degrees. In a 2 quart shallow baking dish, toss the squash with the cream, sage, ½ cup of the Parmesan, salt and pepper. Cover and bake for 30 minutes. Remove the cover, top with the remaining Parmesan and bake for 20 minutes more, uncovered. Let stand for 5 minutes before serving.

Pin It Now!

Monday, September 28, 2015

Chipotle Honey Chicken Tacos


I don't know why it took me so long to make this recipe from The Brewer and the Baker.  It has been on my list for nearly a year now.  Now that school is in full swing, things have been a lot busier around here, so crockpot meals are a staple.  Miss F doesn't get home from art class and dance until past 5 pm, which usually involves me picking her up.  This leaves very little time for dinner prep, you know with trying to work in a bath and homework each evening.  Miss F and I were huge fans of this chicken, C was not as impressed.  He said they were "too sweet" and didn't touch the leftovers.  I think I may reduce the honey to a tablespoon or two next time I make them.
Chipotle Honey Chicken Tacos

1 pound boneless, skinless chicken breast
1 to 2 chipotle peppers in adobo sauce
¼ cup honey
¼ small onion, roughly chopped
1 clove garlic
1 tablespoon olive oil
Dash Worcestershire sauce
¼ cup water

Tortillas
Guacamole
Shredded Monterrey Jack cheese
Tomatoes

Place chicken breasts in a crockpot. Add the chipotles, honey, onion, garlic, oil, Worcestershire sauce and water in a blender or mini food processor. Puree until smooth. Pour the sauce over the chicken, cook on low for 4 hours. Remove the chicken and shred using two forks, return to the cooking liquid and stir well to combine. Serve on warm tortillas with guacamole, cheese and tomatoes.
Pin It Now!

Thursday, September 24, 2015

Asian Flat Iron Steak


I picked up a super sale flat iron steak at the grocer and I wanted to make something besides fajitas.  The broiled flat iron steak was perfectly cooked, it may be my new go to way to prepare it.  The sauce was rich and perfect over rice with sesame green beans.  C thought the sauce was too much, he had seconds of the steak, but was fine with no additional sauce.  Miss F ate all her steak willingly, but she was upset with the sesame green beans.  She loves to pick the beans from inside steamed green beans, this would be far too messy with sauteed beans. This recipe was inspired from Once Upon a Chef.
Asian Flat Iron Steak

For the Sauce
2 teaspoons vegetable oil
2 teaspoons minced fresh ginger
1 garlic clove, minced
¼ cup dry Sherry
¼ cup soy sauce
1 tablespoon tomato paste
2 tablespoons light brown sugar
1/3 cup water
½ teaspoon Asian sesame oil
2 teaspoons unsalted butter
For the Steak
1 one pound Flat Iron Steak
½ teaspoon kosher salt
¼ teaspoon ground black pepper

Preheat the broiler and set an oven rack in the top position.

Heat the oil in a small saucepan over medium heat. Add the ginger and cook until softened and fragrant, a few minutes. Add the garlic and cook for 1 minute more. Do not brown. Add the dry Sherry, soy sauce, tomato paste, brown sugar and water; bring to a boil, then turn the heat down and simmer gently until just slightly thickened 4 to 5 minutes. Add the sesame oil and butter and stir until the butter is melted. Set aside.

Season the steak on both sides with salt and pepper and place on a broiler pan (or rack on top of a baking sheet). Broil the steak to desired doneness, about 5 minutes per side for medium-rare. Using tongs, transfer the steak to a cutting board; cover with foil and let rest for 10 minutes to let the juices settle (don't rush this step or the juices will gush out of the steak when you cut it). Cut the steak into thin slices across the grain and serve with the sauce.
Pin It Now!

Monday, September 21, 2015

Crab Pizza


Some things I just instantly want to make. Enter Crab Pizza. It was destiny. My parents had one last container of crabmeat from a crab feast and I had an afternoon free to head down to their house to swim.  This pizza was perfection.  All the wonderfulness that is crab dip on top of pizza crust.  My parents and I devoured the entire pizza for lunch, but it would be fantastic cut into squares as an appetizer.  Thankfully we are having crabs next week, so we can replenish our crabmeat supply.
Crab Pizza

For the white sauce:
1 tablespoon butter
1 tablespoon flour
¾ cup heavy cream or half-and-half
1 clove garlic, finely minced
Salt and pepper, to taste

For the pizza:
half recipe of pizza dough
Olive oil, for brushing
½ cup mozzarella cheese, shredded
½ cup cheddar cheese, shredded
½ pound fresh crab meat
Old Bay, for topping

To make the white sauce, melt the butter in a small saucepan over medium-high heat. Whisk in the flour and cook, whisking constantly, until bubbling and light golden, about 1 minute. Whisk in the heavy cream and garlic, and season with salt and pepper to taste. Cook, stirring frequently, until the mixture thickens and bubbles. Remove from the heat and set aside.

To make the pizza, preheat the oven and a pizza stone to 500 F for at least 20 minutes. Shape the dough into a 12-14 inch round. Lightly brush the perimeter of the dough with olive oil. Spread a thin layer of white sauce over the crust, leaving a border clear around the edge for the crust and reserving ¼ cup of the sauce. Sprinkle on the shredded mozzarella and cheddar cheeses.

Transfer the pizza to the preheated pizza stone and bake until the cheese is melted and bubbling and the crust is lightly browned, about 8 minutes. Remove from the oven, and top with fresh crab and reserved sauce. Return to oven for a minute or two, just to warm the crab. Remove from oven and let cool slightly before slicing and serving. Sprinkle with Old Bay to taste.
Pin It Now!

Thursday, September 17, 2015

Crockpot Sweet and Spicy Pulled Pork


I entered a Fantasy Football game for the first time ever this year. Shawnda hosted the draft party and served her amazing margaritas. We had so many delicious snacks, but the standout was this pulled pork. I wanted to make it straight away, the recipe is adapted from America's Test Kitchen.  This is quite possibly the best pulled pork recipe I have ever made and I am going to use the fat separator method from here on out for all pulled pork recipes.  I had delicious margaritas, amazing pulled pork and drafted Tom Brady in the late rounds.  Total win.  And so far, I am #1-0 in fantasy football (shout out to Tom Herman!)
Crockpot Sweet and Spicy Pulled Pork

2 canned chipotle chiles in adobo sauce
1 tablespoon chile powder
¾ cup pineapple juice
4 garlic cloves, peeled
1 tablespoon light brown sugar
¼ teaspoon ground cumin
1/8 teaspoon ground cloves
1 (3-pound) boneless pork butt roast, trimmed and halved
Salt and pepper, to taste
1 tablespoon fresh lime juice, plus extra as needed
Tortillas for serving

Purée chipotle chiles, chile powder, pineapple juice, garlic, sugar, cumin and cloves in blender until smooth, about 30 seconds. Transfer to slow-cooker. Season pork with salt and pepper, add to slow-cooker and coat evenly with sauce mixture. Cover and cook until pork is tender, 9 to 11 hours on Low, or 5 to 7 hours on High.

Transfer pork to large bowl, let cool slightly, then shred into bite-size pieces, discarding excess fat; cover to keep warm. Let braising liquid settle for 5 minutes, then remove fat from surface using a large spoon.

Toss shredded pork with 1 cup braising liquid; add more liquid as needed to keep meat moist and flavorful. Stir in lime juice and season with salt, pepper and additional lime juice to taste. Serve in warm tortillas.
Pin It Now!

Monday, September 14, 2015

Tomatillo Chicken


Miss F is obsessed with the creamy green sauce at Pappasitos. And when I say obsessed, I mean it. She insists on having her own bowl of sauce to eat with her chips and she eats it prison style, with her arm crooked around the dish. She devours the whole bowl and usually asks for a second. I decided to try and make a similar sauce to serve over baked chicken.  She loved it.  She kept stealing bites of the sauce as I was preparing it.  I may have become a little obsessed with it too.  The sauce was also delicious over Mexican sour cream rice.  I adapted the recipe from Le Crème de la Crumb.
Tomatillo Chicken

½ cup mayo
½ cup sour cream
½ cup buttermilk
1 package buttermilk ranch dressing mix
2½ teaspoons garlic
3 tomatillos, husked and chopped
½ teaspoon lime juice
4 boneless skinless chicken breasts
chopped tomatoes

Whisk together the mayonnaise, buttermilk, ranch dressing mix, garlic, tomatillos and lime juice. Pour half of the dressing in a large Ziploc bag, add the chicken, tossing well to coat. Let marinate at room temperature for 30 minutes.

Preheat the oven to 375 degrees. Grease a shallow baking dish and place the chicken inside. Discard the marinade. Bake for 20 to 25 minutes. Top with the reserved dressing, tomatoes and serve.
Pin It Now!

Thursday, September 10, 2015

Sachertorte


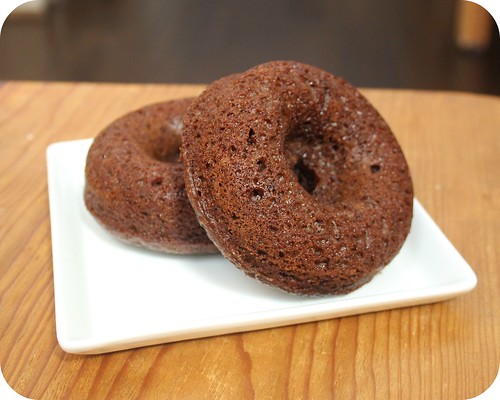
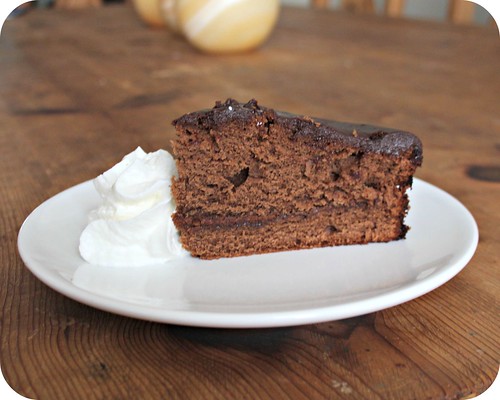
To continue our Austrian theme, Miss F's favorite desserts on our trip were Bienenstich and Sachertorte. She was obsessed with both.  She wanted to make a Sachertorte for Grandad's birthday.  It is a rich chocolate cake glazed with apricot jam and covered in more chocolate.  I heavily adapted the recipe and swapped the chocolate glaze for a ganache, just because it seemed so much easier (and it was!)  Miss F was so sad when the cake was gone, she was already asking to make it again.
Sachertorte

¾ cup chocolate chips
9 tablespoons (1 stick plus 1 tablespoon) unsalted butter, at room temperature
1 cup confectioners' sugar
6 large eggs, separated, at room temperature
1 teaspoon vanilla extract
½ cup granulated sugar
1 cup all-purpose flour
Apricot glaze
Chocolate glaze

To make the torte: Position a rack in the center of the oven and heat to 375 degrees. Lightly butter a 9-inch springform pan and line the bottom with a round of parchment or wax paper. Dust the sides of the pan with flour and tap out the excess.

In the top part of a double boiler over very hot, but not simmering, water, or in a microwave at medium power, melt the chocolate. Remove from the heat or the oven, and let stand, stirring often, until cool. Beat the butter in the bowl of a heavy-duty standing mixer fitted with the paddle blade on medium-high speed until smooth, about 1 minute. On low speed, beat in the confectioners' sugar. Return the speed to medium-high and beat until light in color and texture, about 2 minutes. Beat in the egg yolks, one at a time, scraping down the sides of the bowl. Beat in the chocolate and vanilla.

Beat the egg whites and granulated sugar in a large bowl with a handheld electric mixer on high speed just until they form soft, shiny peaks. Do not overbeat. Stir about one fourth of the beaten whites into the chocolate mixture to lighten it, then fold in the remaining whites, leaving a few visible wisps of whites. Sift half of the flour over the chocolate mixture, and fold in with a large balloon whisk or rubber spatula. Repeat with the remaining flour.

Spread evenly in the pan. Bake until a toothpick inserted in the center comes out clean, about 45 minutes. (The cake will dome in the center.) Cool on a wire rack for 10 minutes. Remove the sides of the pan, and invert the cake onto the rack. Remove the paper and reinvert on another rack to turn right side up. Cool completely.

To assemble: Using a long serrated knife, trim the top of the cake to make it level. Cut the cake horizontally into two equal layers. Place one cake layer on an 8-inch cardboard round. Brush the top of the cake layer with the apricot glaze. Place the second cake layer on top and brush again. Brush the top and sides of the cake with the remaining glaze. Transfer the cake to a wire rack placed over a jelly-roll pan lined with waxed paper. Let cool until the glaze is set.

Make the chocolate glaze (it must be freshly made and warm). Pour all of the warm chocolate glaze on top of the cake. Using a metal offset spatula, gently smooth the glaze over the cake, allowing it to run down the sides, being sure that the glaze completely coats the cake (patch any bare spots with the spatula and the icing that has dripped). Cool until the glaze is barely set, then transfer the cake to a serving plate. Refrigerate until the glaze is completely set, at least 1 hour. Remove the cake from the refrigerator about 1 hour before serving.

To serve, slice with a sharp knife dipped into hot water. Serve with a large dollop of whipped cream on the side.

Apricot Glaze

1 ¼ cups apricot preserves
2 tablespoons water

Bring the preserves and water to a boil in a small saucepan over medium heat, stirring often. Cook, stirring often, until the last drops that cling to the spoon are very sticky and reluctant to leave the spoon, 2 to 3 minutes. Strain through a wire sieve into a small bowl, pressing hard on the solids. Use warm.

Chocolate Glaze

½ cup cream
2/3 cup chocolate chips

Stir together the cream and chocolate chips in a microwave safe bowl. Microwave for 30 second intervals, stirring in between each, until all the chips are melted.
Pin It Now!

Thursday, September 3, 2015

Austrian Potato Salad


I have never eaten one bite of traditional potato salad. My mayo aversion combined with cold potatoes just never made it an appetizing entrée.  I tried Austrian potato salad first in Berlin...and I was hooked.  Warm, vinegary potatoes, it's like a dream.  Growing up, we always had a cruet of apple cider vinegar on the table.  My favorite was to pour it over broccoli or on a baked potato...so good.  This potato salad recipe is from Wolfgang Puck, who I think is probably the most famous Austrian chef out there.  For some reason, my fingerling potato bag had a couple purple potatoes inside, which has never happened before.  The pink color couldn't get Miss F to try them, she is steadfast in her potato hatred.  And of course C wouldn't try them either because of the vinegar smell.  Thankfully, my parents were over for dinner to help me polish them off!
Austrian Potato Salad

1 ½ pounds small fingerling potatoes, washed
2 sprigs fresh thyme
2 ½ tablespoons kosher salt
½ small yellow onion, finely chopped
3 tablespoons sugar
½ teaspoon freshly ground black pepper
1 cup white wine vinegar
¼ cup canola, safflower, or peanut oil
½ cup chicken broth or vegetable broth

In a large saucepan, combine the potatoes, thyme sprigs, and 2 tablespoons of the salt. Add enough cold water to cover completely. Bring to a boil over high heat. Reduce the heat to maintain a simmer and cook until the potatoes are just tender enough to be pierced easily with a skewer or the tip of a sharp knife, about 10 minutes.

Drain the potatoes. While they are still hot, peel them with a small, sharp knife, protecting your hand from the heat with a folded kitchen towel. As each potato is peeled, cut it crosswise into 1/4-inch slices, letting the slices fall into a mixing bowl. Add to the hot potato slices the onion, remaining salt, sugar, pepper, vinegar, and oil. Stir gently but thoroughly with a large spoon to combine the ingredients.

Before serving, heat the broth in a large saute pan over medium-high heat. Add the potato salad and stir it gently just until the potatoes are thoroughly heated, serve.
Pin It Now!

Monday, August 31, 2015

Wiener Schnitzel


We spent a wonderful few weeks in Germany, Belgium, Austria and the Czech Republic. Besides Miss F having sausage at nearly every meal, her favorite food was Wiener Schnitzel, but it had to be true Wiener Schnitzel, she wasn't a fan of the Schweine Schniztel at all.  I made a double recipe, with half made of veal and half made of pounded out pork loin.  Miss F was a huge fan.  She especially loves squeezing copious amounts of lemon juice on each piece.  I adapted the recipe from Bon Appetit.  The best Wiener Schnitzel we had on our trip was in Berlin.  If you ever visit, be sure to give Ottenthal a try.
Wiener Schnitzel

1 cup flour
3 teaspoons kosher salt, divided, plus more for seasoning
2 large eggs
2 tablespoons heavy cream
2 cups fine plain dried breadcrumbs
½ pound veal scaloppine or eye round, cut across the grain into 4 equal pieces
Freshly ground black pepper
2 cups vegetable oil
3 tablespoons unsalted butter
1 lemon, cut into 4 wedges

Line a large baking sheet with a double layer of paper towels. Whisk flour and 1 teaspoon salt in a wide shallow bowl. Lightly whisk eggs and cream in another wide shallow bowl until the yolks and whites are just streaky. Mix breadcrumbs and 2 teaspoons salt in a third wide shallow bowl. Pound veal slices between sheets of plastic wrap to 1/8"-1/16" thickness, being careful not to tear. Season lightly with salt and pepper.

Prop a deep-fry thermometer in a large deep skillet; pour in oil so that bulb is submerged. Heat oil over medium heat to 350°F. Add butter to skillet and adjust heat to maintain 350°F.

Dredge 2 veal slices in flour mixture; shake off excess. Dip in egg. Turn to coat; shake off excess. Dredge in breadcrumbs, pressing to adhere; shake off excess. Transfer slices to skillet. Using a large spoon, carefully baste the top of the veal with the hot oil. Cook until breading puffs and starts to brown, about 1 minute. Turn and cook until browned, about 1 minute longer. Transfer to paper towel-lined sheet. Repeat with remaining veal slices.

Divide veal among plates. Garnish with lemon wedges.
Pin It Now!

Thursday, August 27, 2015

Sopapilla Cheesecake Bars


I first had these at a pool party years ago, same great pool party that I discovered the magic sausage swirls.  I joined a fantasy football league this year, first time ever.  The amazing Confections of a Foodie Bride hosted the draft, complete with her famous margaritas and a nacho bar that was to die for.  I decided to bring these desserts because I could make them a day ahead and they transport easily.  They couldn't be any easier to make and they are completely addictive to eat.  I am glad I had somewhere to take them, or else I might have eaten the whole pan.
Sopapilla Cheesecake Bars

2 cans 8-ounce refrigerated crescent rolls
2 packages 8-ounce cream cheese, softened
1 ½ cups sugar
1 teaspoon vanilla
½ cup butter, melted
1 tablespoon ground cinnamon

Preheat the oven to 350 degrees. Unroll one can of the dough and place in the bottom of a 9x13 glass baking dish, stretch the dough to cover and press the perforations to seal. Beat together the cream cheese, 1 cup of the sugar and the vanilla. Spread the cream cheese mixture over the top of the crescent rolls in the pan. Unroll the second can of dough and place on top of the cream cheese layer, stretching and pinching the seams to cover the cream cheese completely. Pour the butter over top. Mix the remaining sugar with the cinnamon; sprinkle over the melted butter. Bake for 30 minutes. Cool for 20 minutes, refrigerate and cut into bars when ready to serve.
Pin It Now!

Monday, August 24, 2015

Poogan’s Porch Biscuits


I must confess that I have never cooked with shortening before. I have used it to grease the griddle when making pancakes, but that is the only thing I have ever used it for. We spent a week in Beaufort and Charleston, one of the best things I ate was the biscuits at Poogan's Porch.  And I also loved that they had braised short ribs on the kids' menu, which made Miss F quite happy.  I was so excited to try to make them at home, but I was quite nervous to use shortening.  I was nervous for no reason.  These biscuits were perfect, exactly like the ones in the restaurant.  C was a huge fan, which was surprising since he was quite wary of a new biscuit recipe.  Thanks to Katherine Ave for the recipe.
Poogan’s Porch Biscuits

2 cups sifted self-rising flour
2 teaspoons baking powder
2 tablespoons sugar
½ cup shortening
1 cup buttermilk

Preheat the oven to 350 degrees. Stir together the flour, baking powder and sugar. Cut in the shortening with a pastry cutter until coarse crumbs are formed. Stir in the buttermilk until just combined. Pat the dough into a ½ inch thick rectangle on a floured surface. Cut using a biscuit cutter and place on a lightly greased baking sheet. Bake for 12 to 15 minutes, until golden brown.
Pin It Now!

Thursday, August 20, 2015

Corn Chowder


I am somewhat obsessed with corn chowder. It has about all my favorite things in it: corn, potatoes, bell peppers and bacon. I saw a recipe that started out by making a corn infused stock on Spoon Fork Bacon.  I used the infused stock from the recipe, but not much else.  I simplified things a bit so that Miss F could help me make it.  She is an excellent corn shucker, except that it always ends up in corn silks in every nook and cranny of the kitchen.  I loved this soup.   This may be my new go to corn chowder, I am not sure I will make it again without making a corn stock.  It was so incredibly simple, but added so much sweet corn flavor to the soup.
Corn Chowder

3 ears corn, kernels removed from cob
4 cups chicken stock
2 cups water
4 slices bacon, diced
½ medium yellow onion, diced
1 garlic clove, minced
1 poblano pepper, diced
1 red bell pepper, diced
3 red potatoes, diced
¼ cup all purpose flour
1 teaspoon oregano
1 teaspoon salt
½ cup heavy cream

Place ½ of the corn plus the cobs in a pot with the chicken stock and water. Bring to a boil, reduce heat to low and simmer for 40 minutes. Remove the cobs from the pot and discard. Puree the corn and stock, set aside.

In a large pot, sauté the bacon until crisp, about 5 minutes. Remove from the pan and drain on paper towels. Drain all but 1 tablespoon of the grease from the pan. Add the onion, garlic, poblano, bell pepper, potatoes and remaining corn to the pan. Saute for 5 to 7 minutes, until the vegetables begin to soften. Add the flour and stir, sautéing for 3 minutes more. Add the stock to the pan, stirring constantly and simmer for 5 minute to thicken. Stir in the oregano, salt and cream. Simmer for 5 minutes more , serve.
Pin It Now!

Thursday, August 13, 2015

One Pot Creamy Sausage Pasta


I am not a huge ground meat fan. Everyone else in my family is, so when I saw this recipe on Smells Like Home, I knew it would be a hit. I pawned off most of my meat to Miss F, who was happy to eat it.  C complained that it was too "saucy" but Miss F and I enjoyed it very much.  The one pot pasta trick makes for such an easy clean up.  Why haven't I been making pasta like this all along?  It really makes sense.   I used a jar of Kroger brand marinara, which worked just fine and only cost $1.
One Pot Creamy Sausage Pasta

2 tablespoons olive oil
1 red bell pepper, chopped
½ onion, chopped
2 cloves garlic, minced
¼ teaspoons red pepper flakes
1 pound ground Italian sausage
¼ cup dry white wine
24 ounce jar marinara sauce
4 cups water, divided
16 ounces penne pasta
½ cup cream
¼ cup grated Parmesan cheese

Heat the oil in a large skillet over medium-high heat. Add the peppers, onion, garlic, red pepper flakes and sausage to the pan. Break up the sausage as it sautés. Cook for 5 minutes until the sausage is browned. Add the wine to the pan, scraping up any browned bits from the bottom of the pan. Pour the sauce and 3 cups of the water into the skillet, bring to a simmer and stir in the pasta. Reduce the heat to medium-low and cover. Cook for 15 minutes, stirring every 5 minutes or so, adding more water if necessary. Stir in the cream and cheese, cook for 2 minutes more. Salt and pepper to taste and cool for 5 minutes before serving.
Pin It Now!

Monday, August 10, 2015

Garlic Skillet Bread


Miss F declared this to be the second best bread I've ever baked.  I tried to pin her down as to what the best bread I ever made was, but all she could tell me was that it was "plain bread."  Who knows.  This bread couldn't be any easier.  I have never made bread in an iron skillet before and I am now going to make it in there all the time.  The ingredients are simply stirred together, no mixer or kneading needed.  I can't wait to try other adaptations of this recipe, maybe even a plain bread variety. This recipe was adapted from Apple of My Eye.
Garlic Skillet Bread

2 ¼ teaspoons yeast
2 cups warm water
1 teaspoon sugar
1 ½ teaspoons kosher salt
4⅓ cups flour
2 teaspoons olive oil
½ teaspoon garlic salt

In a large bowl, combine the yeast, water and sugar. Let sit for 5 minutes. Stir in the salt and flour, ½ cup at a time. Cover the dough and let rise for 1 hour. Grease two 8” skillets. Divide the dough in 2 equal pieces, form each into a ball and place one in each of the skillets. Cover and let rise for 30 minutes more. Preheat the oven to 400 degrees. Brush the dough with olive oil and sprinkle with the garlic salt. Bake for 15 to 20 minutes, until the top is golden brown.
Pin It Now!

Thursday, August 6, 2015

New Orleans BBQ Shrimp


Miss F and I spent a week straight eating shrimp while we were on vacation in South Carolina. At one meal, she had over 20 shrimp!  I first tried this dish at Chimes in Baton Rouge.  It was so amazing.  Buttery shrimp with the perfect amount of spice with a nice brightness from the lemon juice.  I served it over rice, but it would be equally delicious with some crusty bread.  This recipe was inspired by Once Upon a Chef.
New Orleans BBQ Shrimp

½ teaspoon paprika
½ teaspoon ancho chili powder
½ teaspoon ground cumin
½ teaspoon sugar
½ teaspoon salt
1 pound shrimp, peeled and deveined
3 tablespoons unsalted butter
1 clove garlic, minced
1 tablespoon Worcestershire sauce
1 tablespoon fresh lemon juice
1 tablespoon water
2 cups cooked rice

In a bowl, stir together the paprika, chili powder, cumin, sugar and salt. Toss the shrimp with the spices and coat evenly. Set aside.

Melt the butter over medium heat in a skillet. Add the garlic and cook for 30 seconds. Add the shrimp and cook until they are almost cooked, about 3 to 4 minutes. Add the Worcestershire, lemon juice and water; stir well to combine and cook a minute or two more. Serve the shrimp over rice.
Pin It Now!

Monday, August 3, 2015

Animal Style Burgers


My family loves In n Out burgers.  Every time we visit California, we make our traditional stop at In n Out on the way to the airport.  Usually this results in some sort of spill in the car, but it is totally worth it.  The sauce is what really makes the burgers.  That and the super fresh ingredients.  Texas finally has In n Out, but the closest one is a three hour drive, so I don't get to have them as much as I would like.  This is a recipe from Food Network and my only issue with it was that it made the patties a little too thick for doubling up.  I changed the recipe to halve the meat, which should produce a patty more comparable in size to what In n Out serves.

Animal Style Burgers


2 tablespoons vegetable oil, plus more for brushing
2 large onions, finely chopped
¾ teaspoon salt
¼ cup mayonnaise
2 tablespoons ketchup
1 tablespoon sweet pickle relish
½ teaspoon white vinegar
1 pound ground beef chuck
4 hamburger buns, split
¼ cup sliced dill pickles
8 lettuce leaves
4 to 8 thin slices tomato
Freshly ground pepper
¼ cup yellow mustard
8 slices American cheese

Heat the vegetable oil in a large skillet over medium-low heat. Add the onions and salt, cover and cook, stirring occasionally, until golden and soft, about 30 minutes. (If the onions brown too quickly, reduce the heat to low.) Uncover, increase the heat to medium high and continue to cook, stirring often, until caramelized, about 8 more minutes. Add ½ cup water to the skillet, scraping up any browned bits from the bottom of the pan. Simmer, stirring, until the water evaporates, about 2 more minutes; transfer to a bowl and set aside.

Mix the mayonnaise, ketchup, relish and vinegar in a bowl; set aside. Shape the beef into 8 patties, about 4 inches wide and ½ inch thick.

Heat a griddle or skillet over medium heat; lightly brush with vegetable oil. Toast the buns on the griddle, split-side down. Spread each toasted bun bottom with about 1 tablespoon of the mayonnaise mixture, then top with a few pickles, some lettuce, 1 or 2 slices tomato and another dollop of the mayonnaise mixture; set aside.

Season both sides of the patties with salt and pepper. Working in batches if necessary, put the patties on the griddle and cook 3 minutes. Spread about 1 ½ teaspoons mustard on the uncooked side of each patty, then flip and top each with 1 slice cheese; continue cooking about 2 more minutes for medium doneness. Top 4 of the patties with caramelized onions, then cover with the remaining patties, cheese-side up. Sandwich the double patties on the buns.
Pin It Now!

Thursday, July 30, 2015

Cacio E Pepe


C sent me this recipe from Anthony Bourdain while I was away on vacation with Miss F and my parents. I added it to our weekly menu for when we returned home.  How can you go wrong with cheesy pasta inside a cheesy bowl?    I originally planned to make homemade pasta for this dish, but I decided against it because I think it would overcook in the sauce.  Dried pasta worked perfectly.  This was such a rich dish, but it was really quite simple to make.  I am going to try the same process next time I make fettuccine alfredo.
Cacio E Pepe

¾ cup grated parmesan

¾ pound tagliolini or spaghetti
3 tablespoons butter
1 tablespoon fresh cracked pepper
2 ½ cups grated pecorino cheese

Spread a very thin layer of cheese in a warm non-stick pan, forming into a 6” circle. Cook for 3 to 4 minutes, until the cheese is bubbling. Use a spatula to slide the cheese out of the pan over an upside down bowl that isn’t more than 2” high. Use tongs to press the cheese over the bowl. Set aside to cool.

Cook the pasta in a large pot of salted water for 3 minutes less than the package instructions. Reserve 2 ¼ cups of the pasta water.

Add the pasta water, butter and pepper to a hot skillet. Add the drained pasta to the pan and toss thoroughly in the water until the pasta absorbs nearly all of the water. Remove from the heat and add the grated cheese to the pasta, stir well to combine. Garnish with more grated cheese and pepper and serve in the parmesan bowl.
Pin It Now!

Monday, July 27, 2015

Puffy Chocolate Chip Cookies


I commented on this post from Tide and Thyme nearly four years ago. FOUR YEARS. How did it take me four years to get around to making these cookies?  Miss F calls these cookies "delicious cookies", which is quite adorable since she has a slight lisp right now from her missing top tooth.  They do not spread as much as my usual chocolate chip cookies and stay quite puffy.  Since school is starting back in just a couple weeks (where has the summer gone?), I know I will be making these often this fall for Miss F's lunchbox.  I found the cookies cooked up perfectly in 12 minutes, so be sure to check on them.
Chocolate Chip Cookies
Makes around 4 dozen cookies

3 cups all-purpose flour
1 teaspoon salt
1 teaspoon baking powder
1 cup butter, room temperature
1 cup light brown sugar
1 cup granulated sugar
2 eggs, room temperature
1 teaspoon vanilla extract
2 cups semi-sweet chocolate chips

Preheat oven to 375 degrees. Line cookie sheets with a Silpat or parchment paper. Sift flour, salt, and baking powder into a medium bowl. Set aside.

In the bowl of an electric mixer, cream the butter and sugars together until creamy. Reduce speed to low, and add the eggs (one at a time), and the vanilla. Mix to combine. Slowly add in the sifted flour and mix until just incorporated. Add the chocolate chips to the bowl and mix until they are distributed evenly.

Using a small cookie scoop or a spoon, drop 1-inch balls onto greased cookie sheet, about 2 inches apart. Bake at 375 degrees for 12 to 15 minutes. Cook on cookie sheet for a couple of minutes before transferring to cooling rack as cookies will be very soft.
Pin It Now!

Thursday, July 23, 2015

Pizza Pizzas


This was a fun recipe to make. I had been out a baby shower all afternoon and came home to make the pizza dough for the next night's dinner. The 15 minute kneading seemed crazy, but it made for a really nice dough to work with. It spread out perfectly for a nice crust when I shaped it the following day. Miss F had a blast topping it, she wanted every square inch covered with pepperoni, I think she was quite successful in her efforts. I had a plain mushroom pizza that I baked second, there weren't nearly as many mushrooms as pepperonis. This recipe is adapted from Alton Brown.
Pizza Pizzas

2 tablespoons sugar
2 teaspoons kosher salt
1 tablespoon olive oil
¾ cup warm water
2 cups bread flour
1 teaspoon instant yeast
2 teaspoons olive oil
Olive oil, for the pizza crust
Flour, for dusting the pizza peel
½ cup crushed tomatoes
1 cup shredded Italian cheese blend
Desired toppings

Place the sugar, salt, olive oil, water, flour and yeast in a stand mixer’s bowl. Using the paddle attachment, mix on low until it forms a ball. Swap the paddle for the dough hook and knead for 15 minutes on medium.

Tear off a piece of dough and flatten it, stretching it until thin. Hold up the dough to the light to see if the baker’s windowpane has formed. If the dough tears before it forms, knead for 5 to 10 minutes more.

Roll the dough into a smooth ball and place in a glass bowl. Add 2 teaspoons of olive oil and toss well to coat. Cover and refrigerate for 18 to 24 hours.

Place a pizza stone in the oven and preheat the oven to 500 degrees. Divide the dough into two balls and flatten each into a disk, then fold into a ball. Cover the ball with a towel and let rest for 30 minutes. Repeat with the other ball of dough.

Stretch the dough into a round disk, rotating after each stretch. I liken it to driving a car, just keep turning the wheel. Place the prepared dough onto a sheet of parchment paper.Top with the tomatoes, cheese and any desired toppings. Slide the parchment paper onto the pizza stone and bake for 7 to 9 minutes. Let rest 3 minutes before slicing.
Pin It Now!

Monday, July 20, 2015

Creamy Cucumber Salad

Creamy Cucumber Salad
My grandmother made an amazing cucumber salad. But like many of her amazing dishes, there was no set recipe. It always went a little of this, a little of that...taste taste taste...then something perfect was served. She made a pie crust with vegetable oil that was insanely delicious and I don't know anyone who was able to successfully replicate it.  The only real success this year in my mom's vegetable garden has been cucumbers.  There have been a few tomatoes and bell peppers, but cucumbers have dominated the show.  C and Miss F refuse to try cucumber salad, so I keep it in a dish in the fridge and snack on it at random.  Or pull it out as a side for dinner in a single serving bowl.  This is the best I have been able to replicate my grandmother's dish, it is especially nice with homegrown cucumbers.
Creamy Cucumber Salad

¼ cup sour cream
1 teaspoon white vinegar
1 teaspoon sugar
¼ teaspoon salt
¼ teaspoon pepper
2 large cucumbers, sliced

Whisk together the sour cream, vinegar, sugar, salt and pepper. Stir in the sliced cucumber. Cover and chill for at least one hour. Serve.
Pin It Now!

Thursday, July 16, 2015

Mama Ninfa's Fajitas

Mama Ninfa's Fajitas
We now go to El Tiempo to get Mama Ninfa's fajitas, but when I first moved to Houston, Ninfas was my go to restaurant for TexMex fajitas.   Miss F prefers cheese enchiladas to fajitas, but she will tolerate them as long as she loads up beans in her tortilla as well.  The citrus really adds great flavor to the meat and the marinade couldn't be any easier.  I made these on my grill pan indoors, which was quite smoky fun, but they would be fantastic grilled outdoors.  Thanks to Culinary Houston for the recipe.
Mama Ninfa’s Original Fajtas

½ orange, zested
1 teaspoon fresh lemon zest
¼ cup fresh lemon juice
2 tablespoons water
2 tablespoons pineapple juice
2 tablespoons soy sauce
1 clove garlic, minced
1 ½ teaspoons black pepper
1 dried chiles de arbol crushed
1 skirt steak, no more than ¾ inch thick.

12 warm flour tortillas
Condiments such as Pico de Gallo, Cilantro, Sour Cream, Guacamole, etc.

Combine the orange and lemon zest, lemon juice, water, pineapple juice, soy sauce, garlic, pepper and chiles in a large baking dish. Use a sharp knife to remove any membrane from the meat and place it in the marinade. Cover with plastic wrap and marinate at room temperature for 1 hour. Grill for 5 to 7 minutes per side. Cut crosswise into 1” strips and serve warm on tortillas with any desired condiments.
Pin It Now!

Monday, July 13, 2015

Sweet Sriracha Glazed Pork Skewers

Sweet Sriracha Glazed Pork Skewers
As soon as I saw this glaze on Pink Parsley, I knew I wanted to try it. I adapted it to include other veggies on the skewers for a more complete meal.  This glaze is amazing.  I am going to try it on chicken next.  Miss F had a grand time threading the skewers.  She made pork and bell peppers ones for herself and made skewers without tomatoes for C.  Feel free to make these on the grill, they would be equally fabulous on the barbecue.  Miss F had such a great time making the skewers, she made us fruit skewers for dessert that evening.  It's more fun to eat from a stick!
Sweet Sriracha Glazed Pork Skewers

1 pound boneless thick cut pork chops, cut into 1” cubes
1 teaspoon kosher salt
3 tablespoons brown sugar
2 tablespoons Sriracha
1 teaspoon cornstarch
1 bell pepper, seeded and chopped
1 small can pineapple chunks
1 cup grape tomatoes

Toss the pork and salt together in a bowl. Let stand at room temperature for 20 minutes. Whisk together the brown sugar, Sriracha and cornstarch in a small bowl. Soak wooden skewers in water and spray a broiler pan with cooking spray. Preheat the broiler to high. Thread the pork, bell pepper, pineapple chunks and tomatoes onto the skewers and place them on the prepared pan. Brush the skewers with half of the glaze. Broil the skewers for 4 to 5 minutes, flip the skewers and brush with the remaining glaze. Broil for 4 to 5 minutes more. Serve.
Pin It Now!

Wednesday, July 8, 2015

Red Velvet Cupcakes

Red Velvet Cupcakes
I love red velvet cake. I first fell in love because it is a far superior vehicle for cream cheese frosting than carrot cake. Cream cheese frosting makes everything better. I had a block of cream cheese in the fridge just begging to be turned into frosting. Miss F was a huge helper with these cupcakes, much more than her usual prepping the muffin tins with paper liners. The only issue with her helping in the kitchen is that she stands on one of our kitchen chairs, which makes getting around the kitchen a bit tricky.  She is still working on learning the difference between a teaspoon and a tablespoon, but she is really getting to enjoy cooking and baking.  Be mindful of the cook time on these and be sure to check on them right at 20 minutes, which was just perfect.  Thanks to Tide and Thyme for the perfect recipe. 
Red Velvet Cupcakes

2 ½ cups cake flour
1 teaspoon baking powder
2 tablespoons unsweetened cocoa powder
1 teaspoon salt
½ cup unsalted butter, softened
1 ½ cups sugar
2 eggs, at room temperature
1 teaspoon vanilla extract
1 cup buttermilk, at room temperature
1 to 2 teaspoons red gel food coloring
1 teaspoon white vinegar
1 teaspoon baking soda

Preheat oven to 350 degrees. Line two 12-cup muffin tins with cupcake papers. Sift together the cake flour, baking powder, cocoa and salt into a medium bowl; set aside. In a large bowl, using a hand mixer or stand mixer, beat butter and sugar together until light and fluffy, about three minutes.

Beat in eggs, one at a time, then beat in vanilla, scraping down the bowl with a spatula as you go. Add one third of the flour mixture to the butter mixture, beat well, then beat in half of the buttermilk. Beat in another third of flour mixture, then second half of buttermilk. End with the last third of the flour mixture, beat until well combined, making sure to scrape down the bowl with a spatula. Add the gel food coloring, a drop or two at a time, until a deep red color is reached.

In a small bowl, mix vinegar and baking soda. Add the vinegar mixture to the cake batter and stir well to combine. Using an ice cream scoop, fill cupcake cups with cake batter. Bake the muffin tins on the middle rack of a preheated 350 degree oven. Bake for approximately 20 to 22 minutes, until an inserted toothpick comes out clean.

Cool the cupcakes in their tins on a wire rack for 10 minutes then remove and allow to cool completely before frosting.

Cream Cheese Frosting

8 ounces cream cheese
4 ounces butter
3 ¾ cups confectioner’s sugar, sifted
½ teaspoon vanilla extract
1/8 teaspoon salt

Cream the butter, cheese and salt in a stand mixer until light and fluffy. Gradually add the sugar until incorporated, then add the vanilla and salt.
Pin It Now!

Monday, July 6, 2015

Sweet Corn and Pea Ravioli with Creamy Basil Sauce

Sweet Corn and Pea Ravioli with Creamy Basil Sauce
It was time to break out my birthday gift to make another batch of ravioli.  Which once again, meant I needed my hand sous chef, Miss F, to assist.  She and C were at the zoo that afternoon and had called me saying they were too hot to walk home.  I drove over to pick them up and immediately put my little chef to work.  She was a tremendous help.  I used the recipe for the pasta from our cooking class at the Four Seasons, it was much preferable to the recipe that came with the pasta roller.  I created the filling and the sauce on my own, it is exactly how I prefer my ravioli.  It was incredibly delicious and I went back for seconds.  C has requested butternut squash ravioli and Miss F has requested chocolate strawberry ravioli next...
Sweet Corn and Pea Ravioli with Creamy Basil Sauce

1 ¾ cups flour
1 cup semolina flour
6 egg yolks
3 tablespoons wine
1 tablespoon water
1 tablespoon olive oil
½ teaspoon salt

1 tablespoon butter
2 cobs of corn, kernels removed from cob
¾ cup frozen peas, thawed
1 teaspoon dried parsley
¼ cup grated Parmesan cheese

1 cup cream
¼ cup grated parmesan cheese
¼ cup basil, cut into chiffonade
¼ teaspoon pepper

Stir together the flour, semolina, egg yols, wine, water, oil and salt. If the dough doesn't come together, add a little more water, a teaspoon at a time. Form into a ball. Let rest for two hours. Roll the pasta per your pasta rollers instructions. Cut into 2 ½” squares.

In a largeskillet, heat the butter over medium heat. Add the corn, peas and herbs. Saute for 3 to 5 minutes, stirring often. Stir in the parmesan cheese.

Spoon 1 tablespoon of the corn and pea mixture onto half of the pasta squares. Brush the edges of each with water and lay a second square overtop, pressing to seal. Set aside.

In the same skillet, add the cream to any leftover corn and peas. Bring the cream to a simmer over medium heat, reduce heat to low. Stir in the Parmesan, basil and pepper.

Bring a large pot of salted water to a boil. Boil the raviolis for two minutes, drain and toss with the creamy basil sauce.
Pin It Now!

Thursday, July 2, 2015

Texas Peach Pie

Texas :Peach Pie
The other day I realized I had never blogged a plain peach pie before. It's peach season here in Texas and we are tearing through huge bowl fulls of fresh peaches and nectarines. The biggest effort for this pie is peeling the peaches, which is made easier by blanching them first. The peach skin stained my wood cutting board a deep purplish blue, it was the oddest thing. It all came out in the wash though. Miss F has really taken to helping make pie crusts, she is a master food processor operator. Serve this pie with a big scoop of vanilla ice cream and you are ready for summer.  This recipe is adapted from both Martha Stewart and Food & Wine.
Texas Peach Pie

2 ½ cups flour
1 tablespoon sugar
1 teaspoon salt
1 cup cold butter
3 to 4 tablespoons ice water

8 large, ripe but firm peaches (3 ½ pounds)
¾ cup sugar
1 ½ tablespoons fresh lemon juice
¼ cup plus 1 tablespoon flour
1 ½ tablespoons butter, thinly sliced

Pulse flour, sugar and salt in a food processor until combined. Add butter and process until mixture resembles coarse meal, about 10 seconds. With the machine running, add ice water in a slow steady stream until mixture just begins to hold together.

Shape dough into a disk, wrap in plastic and refrigerate 1 hour or up to 3 days, before using. When ready, roll out ¾ of the dough into a 10” circle. Press the dough into a 9” pie pan and put it in the refrigerator. Place the remaining dough back into the refrigerator, wrapped in plastic wrap.

Preheat the oven to 400 degrees. Bring a large pan of water to a boil and make a large bowl of ice water. Score an “X” into the bottom of each of the peaches. Boil each peach for a minute, then put straight into the bowl of ice water. Peel the peaches, then slice into wedges.

In a large bowl, stir together the peaches, sugar, lemon juice and flour. Pour the peaches into the refrigerated pie crust and top with the sliced butter. Roll out the remaining dough into six 1 ½“ strips, weave the strips overtop of the pie and crimp the edges.

Place the pie on a cookie sheet and bake for 30 minutes. Reduce the oven temperature to 375 degrees and cover the edges of the pie with foil, bake for 40 minutes more. Transfer the pie to a wire rack and cool. Serve with vanilla ice cream.
Pin It Now!

Monday, June 29, 2015

Short Rib Ravioli

Short Rib Ravioli
I have had the Kitchenaid Pasta attachment for awhile now, but I wasn't able to make pasta sheets with it. The few times I have made ravioli, I have borrowed a hand crank machine from a friend. We used the pasta roller attachment in our cooking class at Quattro and I have been wanting one ever since. I finally got one as a birthday gift last week and I was so excited to try it out. I used the pasta recipe that came with the machine, but next time I am going to try the recipe from Quattro. Miss F was a huge help in making the raviolis, her job was to wet the pasta so that I could seal the two pieces together, she was a great assistant.
Short Rib Ravioli

1 pound boneless short ribs
½ onion, diced
1 14.5 ounce can petite diced tomatoes
1 can tomato paste
¾ cup red wine
1 tablespoon brown sugar
1 teaspoon oregano
1 teaspoon salt

4 eggs
3 ½ cups flour
1 tablespoon water
½ teaspoon salt

Place the short ribs and onion in a crockpot. Stir together the tomatoes, tomato paste, red wine, sugar, oregano and salt together and pour over the short ribs. Cover and cook on low for 6 to 8 hours. Remove the meat and shred with two forks. Reserve the tomato sauce.

Place the eggs, water, flour, and salt in mixer bowl. Attach bowl and flat beater. Turn to Speed 2 and
mix for 30 seconds. Exchange the beater for the dough hook, turn to speed 2 and knead for 2 minutes. Remove the dough from the bowl and knead by hand for 2 minutes more. Return the dough to the bowl, cover with a dish towel and let rest for 20 minutes. Divide the dough into four equal pieces. Flatten the dough, then run through the pasta roller at setting 1. Fold in half and run through the roller twice more, folding in half each time. Change the roller setting to 2, run through two more times, folding in half between each run. Repeat for setting 3, 4 and 5. Flour a cookie sheet and the work surface. Use a 2”circle cutter to cut 16 circles of pasta. Add a tablespoon of the meat to half of the circles and brush the edges with water. Top each circle with another pasta circle, being careful to push out the air and create a tight seal. Lay the prepared raviolis on the floured cookie sheet and cover with a dish towel. Repeat for the additional 3 balls of dough.

Heat one tablespoon of butter in a Dutch oven over medium heat. Add the reserved tomato sauce and any shredded meat not used to fill the ravioli bring to a simmer and reduce heat to low.

Bring a large pot of salted water to a boil. Add the raviolis and boil for 2 to 3 minutes. Add the raviolis to the Dutch oven once they are done cooking. Add ¼ to ½ cup of the pasta cooking water to the sauce to create the desired consistency. Serve with fresh basil.
Pin It Now!
Related Posts Plugin for WordPress, Blogger...