Sunday
Monday
Tuesday
Wednesday
Thursday
Friday
Saturday
lattice chicken pot pie
Mexican street corn pasta
chicken Ghiveci
creamy chicken tortilla soup, jalapeno jack popovers
butter basted ribeyes, twice baked potatoes, broccoli
brisket tacos, pinto beans
pork souvlaki, naan

Showing posts with label dessert. Show all posts

Tuesday, August 8, 2017

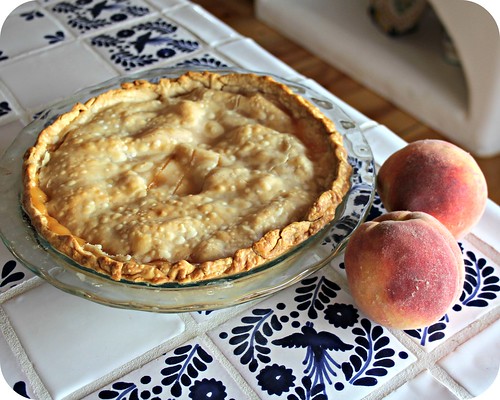
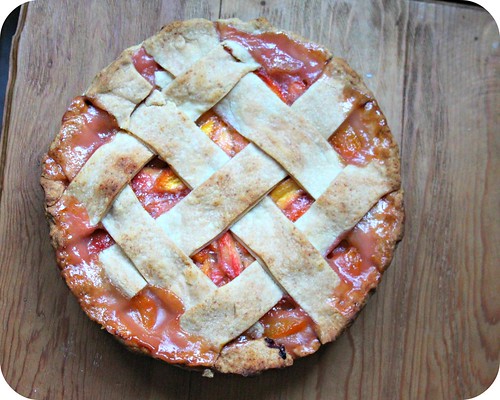
Palisade Peach Pie


I had never heard of Palisade Peaches before, but my BFF raved about them when we were talking about peaches (like you do) and so when I saw a pick up truck with a giant "Palisade Peaches" sign, I knew I had to stop.  I got a huge bag of peaches for $8, one of which was eaten by Miss F straight away, and knew pie was in my future.  I used refrigerate pie crusts because I didn't want to try and deal with making pie crust in a kitchen with out air conditioning.  We are hosting Thanksgiving in Colorado and I will attempt homemade crust then, when there will hopefully be snow on the ground.  C loved the filling, but was meh on the crust.  I guess he much prefers homemade, who doesn't? 
Palisade Peach Pie

3 ½ pounds peaches
1 tablespoon fresh lemon juice
¼ cup sugar
¼ cup brown sugar
¼ teaspoon cinnamon
¼ cup flour
2 refrigerated prepared pie crusts

Preheat the oven to 425 degrees. Bring a large pan of water to a boil and make a large bowl of ice water. Score an “X” into the bottom of each of the peaches. Boil each peach for a minute, then put straight into the bowl of ice water. Peel the peaches, then slice into wedges.

In a large bowl, stir together the peaches, lemon juice, sugar, brown sugar, cinnamon and flour. Place the one of the pie crusts into a pie pan. Add the peach mixture to the pan, mounding high in the center. Top with the second pie crust and crimp the edges to seal. Make three cuts in the center of the crust to vent the pie.

Place the pie on a cookie sheet and bake for 20 minutes. Reduce the oven temperature to 375 degrees and cover the edges of the pie with foil, bake for 30 to 40 minutes more. Transfer the pie to a wire rack and cool. Serve with vanilla ice cream.
Pin It Now!

Thursday, May 18, 2017

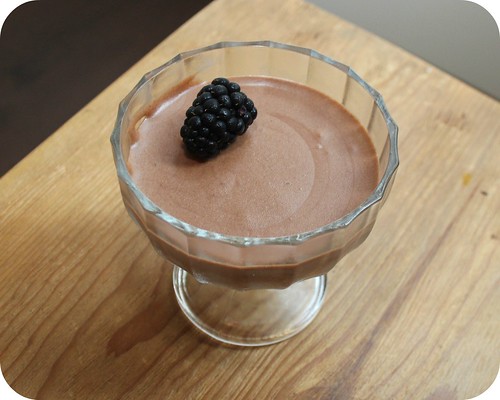
Chocolate Mousse


Miss F has a chocolate mousse obsession. Every since she first tasted it in Paris, she has been hooked. And I agree! I also had it for the first time in Paris as a kid and I adored it. It came out in a giant communal bowl and you served yourself from it. Not the most sanitary way to enjoy chocolate mousse at a restaurant, but it was delicious nonetheless.   This is a great dessert to serve at a dinner party because everything is done in advance.  Last dinner party I served this in cute little glasses that I got at the dollar store.  You can top with whipped cream if you are feeling indulgent and whatever fresh berries you have on hand work great. 
Chocolate Mousse

4 cups chilled heavy cream
8 large egg yolks
1/3 cup sugar
2 teaspoons vanilla
2 1/3 cup semisweet chocolate chips

Heat 1 ½ cups cream in a 2-quart heavy saucepan until hot over medium-high heat. Whisk together the yolks, sugar, and a pinch of salt in a metal bowl until combined well, then add the hot cream in a slow stream, whisking until combined. Transfer mixture to saucepan and cook over low heat, stirring constantly, until it registers 160 degrees on the thermometer. Pour custard through a fine-mesh sieve into a bowl and stir in vanilla.

Melt chocolate in a double boiler or a metal bowl set over a pan of simmering water (or in a glass bowl in a microwave at 50 percent power 3 to 5 minutes), stirring frequently. Whisk custard into chocolate until smooth, then cool.

Beat remaining 2 ½ cups cream in a bowl with an electric mixer until it just holds stiff peaks. Whisk one fourth of cream into chocolate custard to lighten, then fold in remaining cream gently but thoroughly.
Spoon mousse into 16 (6-ounce) stemmed glasses or ramekins and chill, covered, at least 6 hours. Let stand at room temperature about 20 minutes before serving.
Pin It Now!

Monday, November 7, 2016

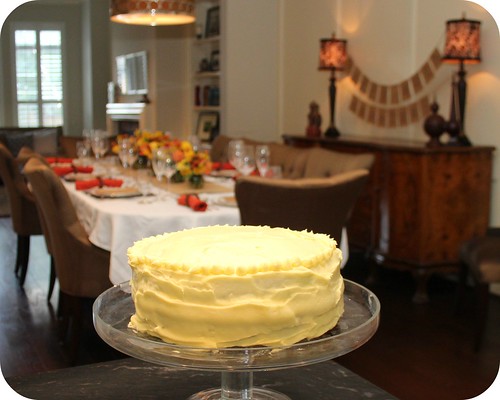
Lemon Layer Cake


A dear friend was turning 40 and to celebrate, I hosted a girls only dinner party. The guest of honor requested a lemon cake for dessert and I happily agreed, since I love lemon almost as much as I love chocolate.  I used my go to, lemon cream cheese frosting, but I wanted to try a new lemon cake.  I have a major aversion to zest in cakes, I just don't enjoy the texture at all.  I heavily adapted this recipe from one I saw on the Chowhound message board.  The buttermilk gives it the perfect tang.  We devoured this cake, but I made sure to save a piece for Miss F, who was snoozing away upstairs while we celebrated (or cackled, as C calls it.) 
Lemon Layer Cake

2 cups all-purpose flour
1 teaspoon baking powder
½ teaspoon baking soda
½ teaspoon salt
1 ½ cups granulated sugar
½ cup unsalted butter, softened
3 large eggs
¼ cup fresh-squeezed lemon juice
1 cup buttermilk

8 ounces cream cheese, softened
½ cup butter, softened
¼ cup fresh-squeezed lemon juice
4 cups confectioners’ sugar

Preheat the oven to 350 degrees. Grease and flour two 8” round cake pans, set aside. In a medium bowl, sift together the flour, baking powder, baking soda and salt. In the bowl of a stand mixer, beat the sugar and butter until fluffy, about 5 minutes. Beat in the eggs one at a time. Stir in the lemon juice. Add the flour and buttermilk in three additions, alternating between each. Divide the batter and pour into the two prepared pans. Bake for 32 minutes, until a toothpick inserted into the center of the cake comes out clean. Cool in the pans for 10 minutes, then remove the cakes from the pans to cool on a wire rack.

Beat together the cream cheese and butter for 3 minutes on medium speed. Add the lemon juice. Add the confectioners’ sugar 1 cup at a time and beat for 5 minutes more. Frost the cooled cakes.
Pin It Now!

Monday, August 29, 2016

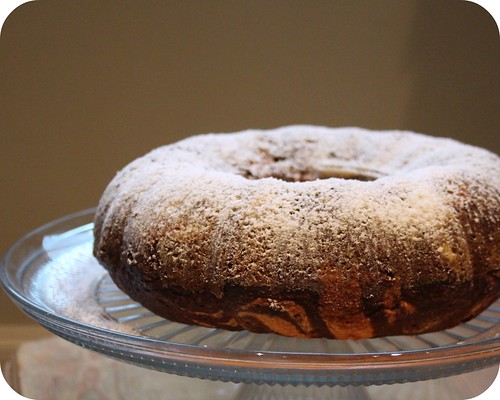
Tiger Bread aka Marble Bundt Cake


We spent an amazing couple of weeks in Fiji and New Zealand.   We returned home on a Sunday and Miss F started school the next Wednesday.  Her request for her school snack was "Tiger Bread."  She had it nearly every morning at our hotel in Fiji.  It was essentially marble cake, but since it was served at breakfast, they called it "bread."  Miss F helped make this cake and really enjoyed swirling the batter to create the tiger stripes.  After a week, the entire cake had been eaten...for breakfast, for snack, for dessert...  This recipe was adapted from Sailu's Food
Tiger Bread aka Marble Bundt Cake
http://www.sailusfood.com/2013/11/15/marble-bundt-cake-recipe-easy/

1/3 cup cocoa powder
3 tablespoons sugar
1/3 cup hot water
2 cups flour
2 teaspoons baking powder
½ teaspoon salt
¾ cup butter, softened
1 ½ cups sugar
4 eggs
1 teaspoon vanilla extract
1 tablespoon powdered sugar

Preheat the oven to 350 degrees. Grease a bunt pan with shortening, then flour it, tapping out any excess. In a small bowl, stir together the cocoa powder, 3 tablespoons sugar and hot water until smooth. Set aside to cool. In a medium bowl, sift together the flour, baking powder and salt. In the bowl of a stand mixer, cream the butter for 2 minutes. Add the 1 ½ cups sugar and beat for 3 minutes more. Add the eggs and beat on low for 1 minute more. Stir in the flour in four additions, stirring until well combined. Transfer a bit less than half of the batter to a bowl and stir in the cocoa mixture. Alternate scoops of vanilla and chocolate batter into the bundt pan using an ice cream disher. Use a knife to swirl the batters into one another, smoothing the top. Bake for 55 to 60 minutes, until a toothpick comes out clean. Cool on a wire rack for 10 minutes, then invert to the wire rack to cool completely. Dust with the powdered sugar after cooling.
Pin It Now!

Thursday, August 4, 2016

Brown Butter Chocolate Chip Cookie Bars


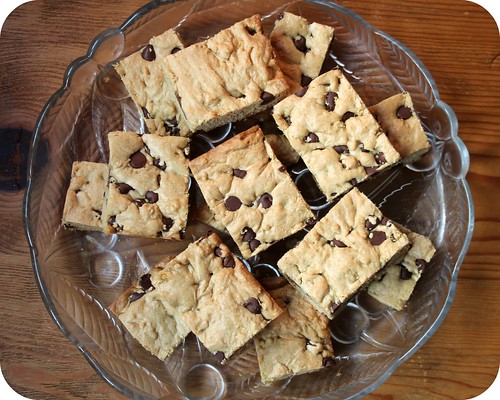
I love a good cookie bar. And a brown butter cookie bar is divine.  Making brown butter is a little more effort than usual, but it is done a heck of a lot faster than allowing a stick of butter to come to room temperature.  The brown butter adds a real richness to these cookie bars.  I loved them.  I may have loved them too much, so I sent most of them over to my parents' house.  That way, I wouldn't be tempted to polish off the entire plate of cookie bars.  Which I could have done.  Easily.  This recipe was based off Wine and Glue
Brown Butter Chocolate Chip Cookie Bars

½ cup butter
2 cups all purpose flour
½ teaspoon salt
½ teaspoon baking soda
½ teaspoon baking powder
¾ cup light brown sugar, packed
¼ cup granulated sugar
2 teaspoons vanilla extract
2 large eggs
1 cup semi sweet chocolate chips

Preheat the oven to 350 degrees. Grease a 9x13 inch glass baking dish with cooking spray and set aside. Melt the butter in a small skillet over medium heat. Once the butter begins to foam up and deepen in color, remove it from the heat and set aside to cool. In a large bowl, stir together the flour, salt, baking soda and baking powder together. In the bowl of a stand mixer, cream together the butter, brown sugar and sugar. Add the vanilla and eggs, then mix well to combine. Stir in the flour mixture and then fold in the chocolate chips. Press the batter into the prepared dish. Bake for 18 to 20 minutes, until the edges are golden brown. Cool and slice into bars.
Pin It Now!

Monday, June 20, 2016

Peach Cobbler


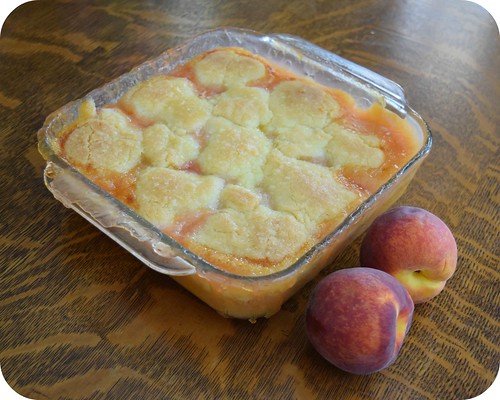
We are a nectarine family. Peaches are okay, but I much prefer a smooth skinned nectarine to a fuzzy peach. Except for baking, where the skin doesn't matter and the fruit is baked. I am so-so on a biscuit topped cobbler, I prefer a more pie crust type recipe. But why not just bake a peach pie? My main aversion is that pie crusts can be tricky in the summer because it is so hot and humid here. So I was looking for a new cobbler recipe and this one was really intriguing. The cobbler topping is a cross between a sugar cookie and a pie crust, which is just perfection. I much prefer it to be warmed and topped with Tillamook vanilla bean ice cream. Delicious. This recipe is adapted from The Kitchn.
Peach Cobbler

8 to 10 large peaches
¾ cup sugar
1 tablespoon fresh lemon juice
3 tablespoons cornstarch

1 ½ cups all-purpose flour
1 ½ cups sugar
¼ teaspoon salt
1 ½ sticks (12 tablespoons) butter, melted

Preheat the oven to 350 degrees. Peel and slice the peaches. Stir the sliced peaches with ¾ cup sugar, lemon juice and cornstarch. Pour the peaches into a 9x9 glass baking dish. Stir together the flour, sugar and salt together in a mixing bowl. Pour in the melted butter and stir to combine into a crumbly dough. Pat handfuls of dough into palm sized disks between ¼ and ½ inch thick, lay the disks over the peaches in a cobblestone pattern. Place the cobbler on a baking sheet and bake for 55 to 60 minutes, until the topping is golden brown at the edges. Cool and serve with whipped cream or ice cream.
Pin It Now!

Thursday, April 14, 2016

Lemon Layer Cake with Cream Cheese Frosting


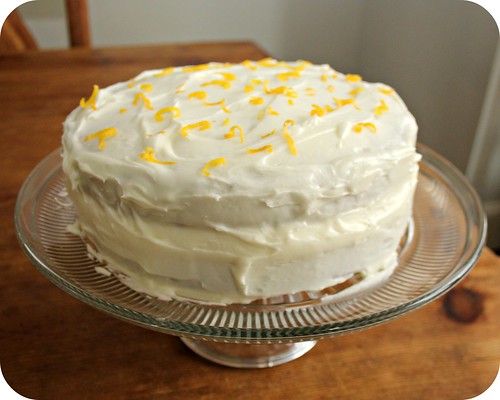
I have never attempted a lemon cake from scratch before. My mom had brought over a ton of lemons from her lemon tree and I figured now was the time to finally try it. And more importantly, to try out lemon cream cheese frosting. I am not sure I can ever make boxed lemon cake again!  I adapted my usual cream cheese frosting recipe to have just a hint of lemon, be sure you use freshly squeezed juice.  The cake recipe is actually  adapted from a Chowhound posting about lemon layer cakes. As usual, I omitted the zest from the recipe because I don't love the texture it adds to sponge cake.  I did add fresh zest to the top of the cake, which Miss F was a huge fan of creating.
Lemon Layer Cake with Cream Cheese Frosting

2 ½ cups cake flour
2 teaspoons baking powder
½ teaspoon baking soda
¼ teaspoon salt
1 cup (2 sticks) unsalted butter, slightly softened
1 ½ cups granulated sugar
2 large whole eggs, at room temperature
3 large egg yolks, at room temperature
½ cup fresh lemon juice
½ cup whole milk

Preheat the oven to 350 degrees. Grease and flour two 9-inch round cake pans; set aside. In a medium
2. In a medium bowl, sift together the flour, baking powder, baking soda, and salt. In the bowl of the stand mixer, beat the butter at medium speed for 30 seconds. Gradually add the sugar and beat until the mixture is light, about 3 minutes. Add the whole eggs and yolks, one at a time, beating well after each addition. Reduce the speed to low, then slowly add the lemon juice. Beat in half of the dry ingredients, alternating with half of the milk after each addition. Beat for 30 seconds after adding all the ingredients. Divide the batter evenly between the two prepared pans. Bake the cakes for 20 to 25 minutes, until a toothpick inserted into the center of each cake comes out clean. Cool the cakes in the pans for 20 minutes, then invert the cakes onto wire racks to cool completely.

½ cup butter, softened
8 ounces of cream cheese, softened
4 cups of confectioners sugar
2 tablespoons fresh lemon juice

Mix all ingredients until smooth. Frost the cooled cake.
Pin It Now!

Thursday, January 28, 2016

Buttermilk Chess Pie


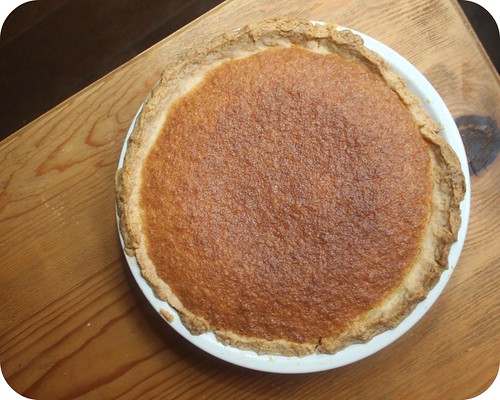
We were flying home from a weekend in Banff (incredible place, I highly recommend visiting!) and C sent me a link to an article on "Forgotten Pies We Should Bring Back."  He requested that I make a Buttermilk Chess Pie, a Sugar Cream Pie and a Shoofly Pie.  After some pie research, I concluded that the Buttermilk Chess Pie seemed to be the best pie to start with and I also informed him that I had no plans to ever make the Shoofly Pie.  I made a crust by hand for Thanksgiving and I actually preferred it to my usual food processor method.  If you like sweet desserts, this is the pie for you.  Miss F and C were in pie heaven, I was longing for a more traditional fruit pie instead.  The filling recipe is adapted from All Recipes.
Buttermilk Chess Pie

Crust:
1 ¼ cups flour
1 tablespoon sugar
¼ teaspoon salt
8 tablespoons (1 stick) cold unsalted butter, cut into ¼ -inch cubes
3 tablespoons ice water

Filling:
2 tablespoons flour
2 cups sugar
5 eggs
2/3 cup buttermilk
½ cup butter, melted
1 teaspoon vanilla

In a large bowl, stir together the flour, sugar and salt. Use a pastry cutter to cut the butter into the flour until the mixture resembles a coarse cornmeal. Stir in the water with a fork until the dough pulls together. Roll out the dough on a well floured surface into a 12” circle. Gently press the crust into a 9” pie pan.

Preheat the oven to 375 degrees. Whisk together the flour, sugar, eggs and buttermilk until well combined. Stir in the butter and vanilla. Pour the filling into the prepared pie crust. Bake for 45 minutes or until the filling is set.
Pin It Now!

Thursday, September 10, 2015

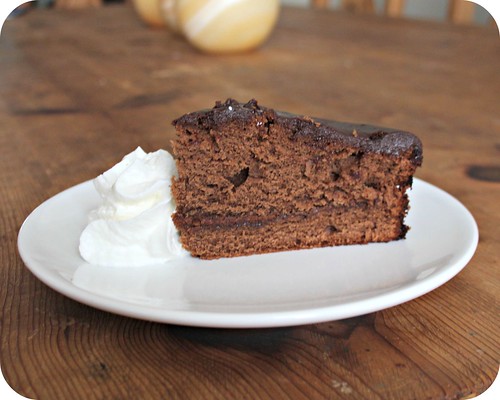
Sachertorte


To continue our Austrian theme, Miss F's favorite desserts on our trip were Bienenstich and Sachertorte. She was obsessed with both.  She wanted to make a Sachertorte for Grandad's birthday.  It is a rich chocolate cake glazed with apricot jam and covered in more chocolate.  I heavily adapted the recipe and swapped the chocolate glaze for a ganache, just because it seemed so much easier (and it was!)  Miss F was so sad when the cake was gone, she was already asking to make it again.
Sachertorte

¾ cup chocolate chips
9 tablespoons (1 stick plus 1 tablespoon) unsalted butter, at room temperature
1 cup confectioners' sugar
6 large eggs, separated, at room temperature
1 teaspoon vanilla extract
½ cup granulated sugar
1 cup all-purpose flour
Apricot glaze
Chocolate glaze

To make the torte: Position a rack in the center of the oven and heat to 375 degrees. Lightly butter a 9-inch springform pan and line the bottom with a round of parchment or wax paper. Dust the sides of the pan with flour and tap out the excess.

In the top part of a double boiler over very hot, but not simmering, water, or in a microwave at medium power, melt the chocolate. Remove from the heat or the oven, and let stand, stirring often, until cool. Beat the butter in the bowl of a heavy-duty standing mixer fitted with the paddle blade on medium-high speed until smooth, about 1 minute. On low speed, beat in the confectioners' sugar. Return the speed to medium-high and beat until light in color and texture, about 2 minutes. Beat in the egg yolks, one at a time, scraping down the sides of the bowl. Beat in the chocolate and vanilla.

Beat the egg whites and granulated sugar in a large bowl with a handheld electric mixer on high speed just until they form soft, shiny peaks. Do not overbeat. Stir about one fourth of the beaten whites into the chocolate mixture to lighten it, then fold in the remaining whites, leaving a few visible wisps of whites. Sift half of the flour over the chocolate mixture, and fold in with a large balloon whisk or rubber spatula. Repeat with the remaining flour.

Spread evenly in the pan. Bake until a toothpick inserted in the center comes out clean, about 45 minutes. (The cake will dome in the center.) Cool on a wire rack for 10 minutes. Remove the sides of the pan, and invert the cake onto the rack. Remove the paper and reinvert on another rack to turn right side up. Cool completely.

To assemble: Using a long serrated knife, trim the top of the cake to make it level. Cut the cake horizontally into two equal layers. Place one cake layer on an 8-inch cardboard round. Brush the top of the cake layer with the apricot glaze. Place the second cake layer on top and brush again. Brush the top and sides of the cake with the remaining glaze. Transfer the cake to a wire rack placed over a jelly-roll pan lined with waxed paper. Let cool until the glaze is set.

Make the chocolate glaze (it must be freshly made and warm). Pour all of the warm chocolate glaze on top of the cake. Using a metal offset spatula, gently smooth the glaze over the cake, allowing it to run down the sides, being sure that the glaze completely coats the cake (patch any bare spots with the spatula and the icing that has dripped). Cool until the glaze is barely set, then transfer the cake to a serving plate. Refrigerate until the glaze is completely set, at least 1 hour. Remove the cake from the refrigerator about 1 hour before serving.

To serve, slice with a sharp knife dipped into hot water. Serve with a large dollop of whipped cream on the side.

Apricot Glaze

1 ¼ cups apricot preserves
2 tablespoons water

Bring the preserves and water to a boil in a small saucepan over medium heat, stirring often. Cook, stirring often, until the last drops that cling to the spoon are very sticky and reluctant to leave the spoon, 2 to 3 minutes. Strain through a wire sieve into a small bowl, pressing hard on the solids. Use warm.

Chocolate Glaze

½ cup cream
2/3 cup chocolate chips

Stir together the cream and chocolate chips in a microwave safe bowl. Microwave for 30 second intervals, stirring in between each, until all the chips are melted.
Pin It Now!

Thursday, August 27, 2015

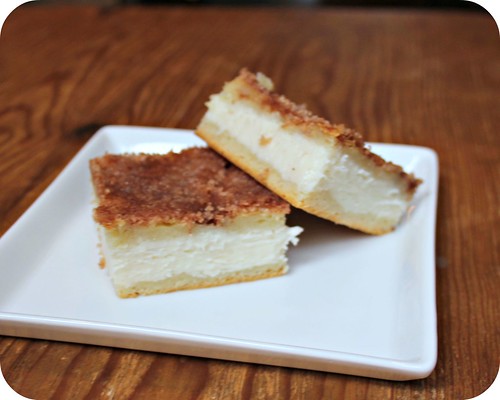
Sopapilla Cheesecake Bars


I first had these at a pool party years ago, same great pool party that I discovered the magic sausage swirls.  I joined a fantasy football league this year, first time ever.  The amazing Confections of a Foodie Bride hosted the draft, complete with her famous margaritas and a nacho bar that was to die for.  I decided to bring these desserts because I could make them a day ahead and they transport easily.  They couldn't be any easier to make and they are completely addictive to eat.  I am glad I had somewhere to take them, or else I might have eaten the whole pan.
Sopapilla Cheesecake Bars

2 cans 8-ounce refrigerated crescent rolls
2 packages 8-ounce cream cheese, softened
1 ½ cups sugar
1 teaspoon vanilla
½ cup butter, melted
1 tablespoon ground cinnamon

Preheat the oven to 350 degrees. Unroll one can of the dough and place in the bottom of a 9x13 glass baking dish, stretch the dough to cover and press the perforations to seal. Beat together the cream cheese, 1 cup of the sugar and the vanilla. Spread the cream cheese mixture over the top of the crescent rolls in the pan. Unroll the second can of dough and place on top of the cream cheese layer, stretching and pinching the seams to cover the cream cheese completely. Pour the butter over top. Mix the remaining sugar with the cinnamon; sprinkle over the melted butter. Bake for 30 minutes. Cool for 20 minutes, refrigerate and cut into bars when ready to serve.
Pin It Now!

Wednesday, July 8, 2015

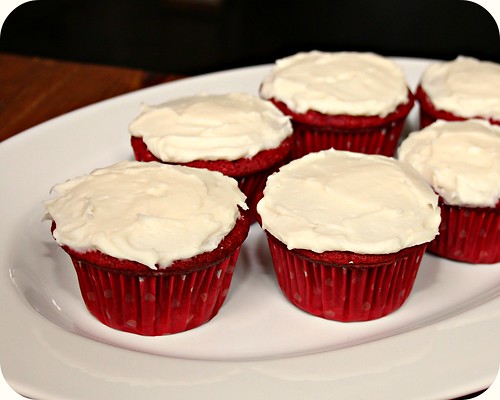
Red Velvet Cupcakes

Red Velvet Cupcakes
I love red velvet cake. I first fell in love because it is a far superior vehicle for cream cheese frosting than carrot cake. Cream cheese frosting makes everything better. I had a block of cream cheese in the fridge just begging to be turned into frosting. Miss F was a huge helper with these cupcakes, much more than her usual prepping the muffin tins with paper liners. The only issue with her helping in the kitchen is that she stands on one of our kitchen chairs, which makes getting around the kitchen a bit tricky.  She is still working on learning the difference between a teaspoon and a tablespoon, but she is really getting to enjoy cooking and baking.  Be mindful of the cook time on these and be sure to check on them right at 20 minutes, which was just perfect.  Thanks to Tide and Thyme for the perfect recipe. 
Red Velvet Cupcakes

2 ½ cups cake flour
1 teaspoon baking powder
2 tablespoons unsweetened cocoa powder
1 teaspoon salt
½ cup unsalted butter, softened
1 ½ cups sugar
2 eggs, at room temperature
1 teaspoon vanilla extract
1 cup buttermilk, at room temperature
1 to 2 teaspoons red gel food coloring
1 teaspoon white vinegar
1 teaspoon baking soda

Preheat oven to 350 degrees. Line two 12-cup muffin tins with cupcake papers. Sift together the cake flour, baking powder, cocoa and salt into a medium bowl; set aside. In a large bowl, using a hand mixer or stand mixer, beat butter and sugar together until light and fluffy, about three minutes.

Beat in eggs, one at a time, then beat in vanilla, scraping down the bowl with a spatula as you go. Add one third of the flour mixture to the butter mixture, beat well, then beat in half of the buttermilk. Beat in another third of flour mixture, then second half of buttermilk. End with the last third of the flour mixture, beat until well combined, making sure to scrape down the bowl with a spatula. Add the gel food coloring, a drop or two at a time, until a deep red color is reached.

In a small bowl, mix vinegar and baking soda. Add the vinegar mixture to the cake batter and stir well to combine. Using an ice cream scoop, fill cupcake cups with cake batter. Bake the muffin tins on the middle rack of a preheated 350 degree oven. Bake for approximately 20 to 22 minutes, until an inserted toothpick comes out clean.

Cool the cupcakes in their tins on a wire rack for 10 minutes then remove and allow to cool completely before frosting.

Cream Cheese Frosting

8 ounces cream cheese
4 ounces butter
3 ¾ cups confectioner’s sugar, sifted
½ teaspoon vanilla extract
1/8 teaspoon salt

Cream the butter, cheese and salt in a stand mixer until light and fluffy. Gradually add the sugar until incorporated, then add the vanilla and salt.
Pin It Now!

Thursday, July 2, 2015

Texas Peach Pie

Texas :Peach Pie
The other day I realized I had never blogged a plain peach pie before. It's peach season here in Texas and we are tearing through huge bowl fulls of fresh peaches and nectarines. The biggest effort for this pie is peeling the peaches, which is made easier by blanching them first. The peach skin stained my wood cutting board a deep purplish blue, it was the oddest thing. It all came out in the wash though. Miss F has really taken to helping make pie crusts, she is a master food processor operator. Serve this pie with a big scoop of vanilla ice cream and you are ready for summer.  This recipe is adapted from both Martha Stewart and Food & Wine.
Texas Peach Pie

2 ½ cups flour
1 tablespoon sugar
1 teaspoon salt
1 cup cold butter
3 to 4 tablespoons ice water

8 large, ripe but firm peaches (3 ½ pounds)
¾ cup sugar
1 ½ tablespoons fresh lemon juice
¼ cup plus 1 tablespoon flour
1 ½ tablespoons butter, thinly sliced

Pulse flour, sugar and salt in a food processor until combined. Add butter and process until mixture resembles coarse meal, about 10 seconds. With the machine running, add ice water in a slow steady stream until mixture just begins to hold together.

Shape dough into a disk, wrap in plastic and refrigerate 1 hour or up to 3 days, before using. When ready, roll out ¾ of the dough into a 10” circle. Press the dough into a 9” pie pan and put it in the refrigerator. Place the remaining dough back into the refrigerator, wrapped in plastic wrap.

Preheat the oven to 400 degrees. Bring a large pan of water to a boil and make a large bowl of ice water. Score an “X” into the bottom of each of the peaches. Boil each peach for a minute, then put straight into the bowl of ice water. Peel the peaches, then slice into wedges.

In a large bowl, stir together the peaches, sugar, lemon juice and flour. Pour the peaches into the refrigerated pie crust and top with the sliced butter. Roll out the remaining dough into six 1 ½“ strips, weave the strips overtop of the pie and crimp the edges.

Place the pie on a cookie sheet and bake for 30 minutes. Reduce the oven temperature to 375 degrees and cover the edges of the pie with foil, bake for 40 minutes more. Transfer the pie to a wire rack and cool. Serve with vanilla ice cream.
Pin It Now!

Monday, May 18, 2015

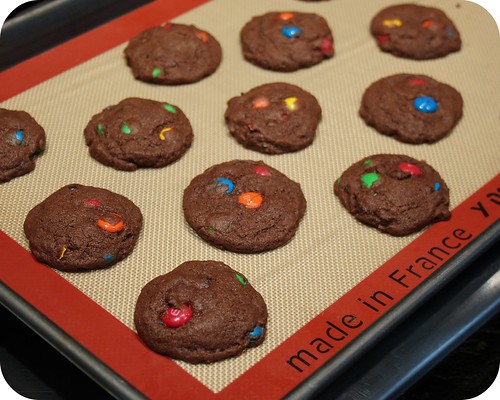
Chocolate M&M Bites

Chocolate M&M Bites
I let Miss F what kind of cookie she wanted for her lunch box for her last week of Kindergarten. I cannot believe that in five short days she will no longer be a Kindergartener. She has blossomed so much and she adores school, she is quite sad that the year is coming to an end. She is ready to start first grade straight away! I am looking forward to a fun summer with her, filled with lots of peanut butter based desserts. She isn't allowed any peanut or nut products at school, which eliminates so many favorites. She wanted a chocolate cookies with M&Ms. I had made M&M blondies recently and I think those were her inspiration.  I adapted the recipe from Tastes of Lizzy Ts.
Chocolate M&M Bites
makes 32 cookies

½ cup butter, softened
¼ cup white sugar
½ cup brown sugar
1 egg
1 teaspoon vanilla extract
1 cup flour
1/3 cup cocoa powder
½ teaspoon baking soda
¼ teaspoon salt
1 cups M&M chocolate candies

Preheat the oven to 350 degrees. Beat the butter, sugars, egg and vanilla together until it is light and fluffy. Add the flour, cocoa, baking soda and salt, stir well to combine. Stir in the M&Ms gently. Drop the cookies by the tablespoon full onto Silpat or parchment lined cookie sheets. Bake for 7 to 9 minutes, cool on a wire rack.
Pin It Now!

Wednesday, April 22, 2015

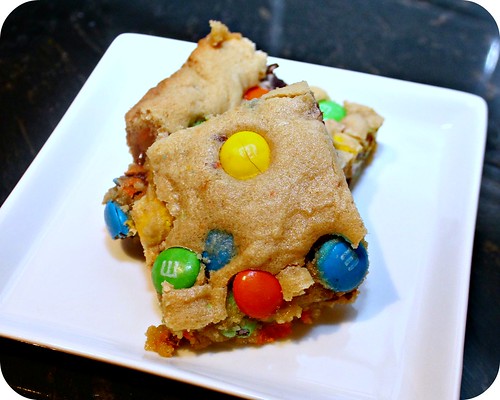
M&M Blondies

M&M Blondies
I made these to take to an impromptu wine night at a friend's house. I was all ready to go and the skies opened up. Literally. My phone was weather alarming like mad and I wasn't ready to make a 25 mile drive in buckets of rain. So I stayed home. And ate three blondies instead of having any wine. They are so good. And I really wish I would have been able to take them all away, that way, C and I wouldn't have devoured them in just a few days. Next time I am going to try them with Reeses Pieces. Thanks to Inside Bru Crew Life for the great recipe, she also was the source of a another favorite, Reeses Cheesecake Brownie Bars
M&M Blondies

½ cup butter, softened
2 cups brown sugar
2 eggs
1 teaspoon vanilla
1 teaspoon salt
2 teaspoons baking powder
2 cups flour
1 ½ cups M&M candies

Preheat the oven to 350 degrees. Cream together the butter and brown sugar, until light and fluffy. Beat in the eggs and vanilla. Sift in the salt, baking powder and flour, stir until just combined. Stir in 1 cup on the M&Ms. Spread the batter into a greased 9x13 baking dish. Top with the remaining ½ cup of M&Ms. Bake for 20 to 25 minutes, cool completely and cut into squares.
Pin It Now!

Wednesday, April 1, 2015

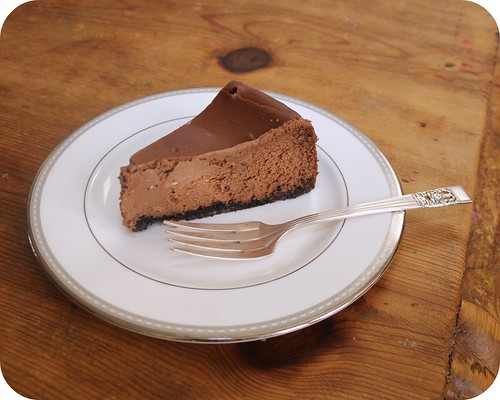
Chocolate Cappuccino Cheesecake

Chocolate Cappuccino Cheesecake
I have never had coffee. I figure by now, it is one of those things it is best not to get hooked on. Saving the money and the calories. The coffee flavor in this cheesecake is detectable, but the rich chocolate is what really shines through. I was clueless when buying the espresso granules, but there was a cute small package that was priced right. I also have the most adorably small bottle of Kahlua ever.  I know I will make this cheesecake again, it was nearly as good as my mom's chocolate cheesecake. Nearly. Thanks to Tide and Thyme of the spectacular recipe.
Chocolate Cappuccino Cheesecake

1 cup Oreo crumbs
¼ cup butter, melted
¼ teaspoon ground cinnamon

1 1/3 cup semisweet chocolate chips
2 tablespoons whipping cream
3 (8 ounce) packages cream cheese, softened
1 cup granulated sugar
3 eggs
1 cup sour cream
¼ teaspoon salt
2 teaspoons instant espresso granules dissolved in ¼ cup hot water
¼ cup Kahlua (or another coffee liqueur)
2 teaspoons vanilla extract

Preheat the oven to 350 degrees. On the bottom rack, place a 9×13 pan and fill with hot water (this creates a make-shift steam bath) and place the other rack in the middle position. Grease a 9-inch springform pan.

To make the crust, combine the Oreo crumbs, butter and the cinnamon. Mix well and press mixture into the greased springform pan, set aside.

In a microwave safe bowl, stir together the chocolate chips and cream. Microwave in 30 second intervals, stirring well after each, until the chocolate is melted. Set aside to cool.

In a stand mixer fitted with a paddle attachment, beat cream cheese until smooth. Gradually add sugar, mixing until well blended. Add eggs, one at a time. Beat at low speed until very smooth. Carefully add chocolate mixture, blend well. Stir in sour cream, salt, coffee, Kahlua, and vanilla; beat until combined. Pour mixture into prepared pan.

Bake over the pan of hot water for 45 minutes. Center will be soft but will firm up when chilled. Turn off oven, crack the oven door, and let the cheesecake rest with the door ajar for 45 minutes. Remove from oven, cover with plastic wrap, and chill for 12 hours. Slice and serve.
Pin It Now!

Monday, September 8, 2014

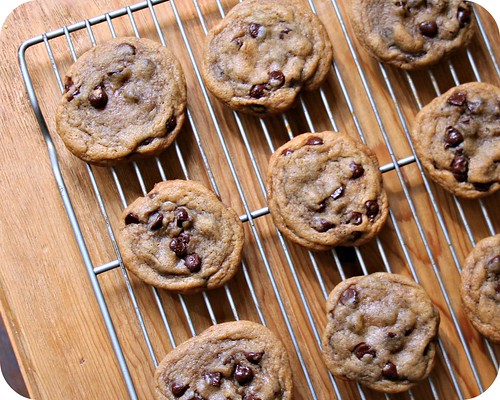
Chewy Chocolate Chip Cookies

Chewy Chocolate Chip Cookies
I wanted to try a new chocolate chip cookie recipe for Miss F's first week of school. I liked this recipe because you had to refrigerate the dough before baking, which meant that I could bake small batches to keep the cookies fresh, reserving the remaining cookie dough in the refrigerator. This recipe is quite similar to my go-to, Big, Fat, Chewy Chocolate Chip Cookies, which I have memorized.  The dark brown sugar gives them a rich hue of brown and they taste amazing.  Miss F was a huge fan, she never tired of these cookies.  I cannot believe she is taking lunch to school every day now that she is in Kindergarten, where does the time go?  Thanks to The Spiffy Cookie for the recipe.
Chewy Chocolate Chip Cookies

2 ¼ cups all-purpose flour, spooned and leveled
1 teaspoon baking soda
1 teaspoon salt
1 cup (2 sticks) unsalted butter, melted and cooled
1 cup packed dark brown sugar
½ cup white sugar
1 tablespoon vanilla extract
1 egg + 1 yolk, room temperature
2 cups semisweet chocolate chips

Sift together the flour, baking soda, and salt; set aside.

In a medium bowl, cream together the melted butter, brown sugar and white sugar until well blended. Beat in the vanilla, egg, and egg yolk until light and creamy. Mix in the sifted ingredients in three batches until just blended. Fold in the chips by hand.

Roll 2 tablespoons of dough into a ball that is slightly taller than wide and place on a plate or tray. Cover tightly and chill for at least 2 hours, but overnight for best results.

Preheat oven to 375 degrees. Line cookie sheets with silicone baking mats or parchment paper; set aside. Place cookie dough onto the prepared cookie sheets, about 2 inches apart. Bake for 8 minutes or until edges are barely golden (will look underbaked). Cool on baking sheets for 10 minutes before transferring to wire racks to cool completely. Store at room temperature in an airtight container.
Pin It Now!

Friday, August 22, 2014

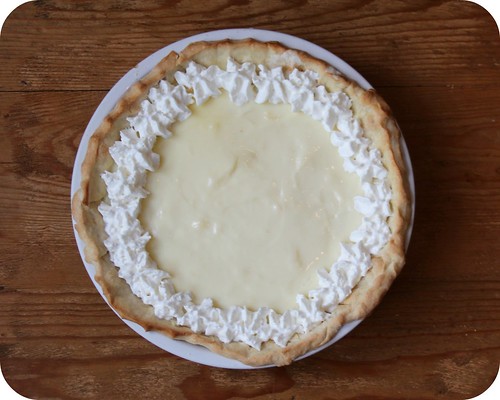
Sour Cream Lemon Pie

Sour Cream Lemon Pie
I let Miss F prepare the crust for this pie from start to finish. She may have gotten a little overzealous when adding the ice water to the dough, which led to the crust shrinking up quite a bit. She knows better for next time and I know better than to give her a full glass of water when she is making pie dough.  The lemon sour cream filling was perfection, Miss F enjoys anything lemon flavored and she snuck a few tastes while I was making it.  She likes lemon so much that she now insists on a lemon wedge in her school water bottle.
Sour Cream Lemon Pie

Pastry for single-crust pie (9 inches)
1 cup sugar
¼ cup cornstarch
1 cup milk
½ cup lemon juice
3 egg yolks, lightly beaten
¼ cup butter, cubed
1 cup (8 ounces) sour cream
1 cup heavy whipping cream, whipped

Preheat oven to 450°. On a lightly floured surface, roll dough to a 1/8 inch thick circle; transfer to a 9 inch pie plate. Trim pastry to ½ inch beyond rim of plate; flute edge.

Line unpricked pastry with a double thickness of foil. Fill with pie weights, dried beans or uncooked rice. Bake 8 minutes or until bottom is lightly browned. Remove foil and weights; bake 5-7 minutes longer or until golden brown. Cool on a wire rack.

In a large heavy saucepan, mix sugar and cornstarch. Whisk in milk and lemon juice until smooth. Cook and stir over medium-high heat until thickened and bubbly. Reduce heat to low; cook and stir 2 minutes longer. Remove from heat.

In a small bowl, whisk a small amount of hot mixture into egg yolks; return all to the pan, whisking constantly. Bring to a gentle boil; cook and stir 2 minutes. Remove from heat. Stir in butter. Cool without stirring.

Stir in sour cream. Add filling to crust. Top with whipped cream. Store in the refrigerator.
Pin It Now!

Monday, July 21, 2014

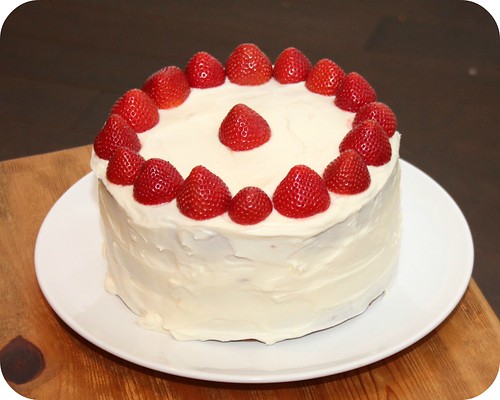
Italian Creme Cake with Strawberries

Italian Creme Cake with Strawberries
I had never made an Italian Crème Cake before, in fact, I am not even sure I have ever eaten one before I made this cake.  Since there were so many guests at the dinner party, I knew I wanted a sizable cake to serve.  This is the first time I have ever made a cake that needed skewers for stability.  I must admit that I forgot to pull them before slicing the cake, so apologies to my guests who got a special surprise in their cake slice.  This cake is the perfect way to use summer strawberries.  I finally have a second bowl for my KitchenAid mixer, so that made things even easier.  Thanks to Restless Chipotle for the amazing recipe.
Italian Creme Cake with Strawberries

6 eggs, room temp
2 cups of sugar, divided
1 cup (2 sticks) of unsalted butter, room temperature
½ teaspoon salt
1 tablespoon vanilla
1 teaspoon baking soda
1 cup buttermilk
2 cups flour
¼ teaspoon baking powder

3/4 cup unsalted butter, softened
16 ounces cream cheese, softened
1 ½ teaspoons vanilla
1 ½ to 2 pounds of powdered sugar
A little buttermilk to thin if needed
2 quarts ripe strawberries, hulled and sliced

Preheat the oven to 325 degrees. Grease and flour three 9-inch round cake pans. Separate the eggs, beat the egg whites until soft peaks form. Add ½ cup sugar gradually, beat until stiff peaks form. Set aside. Cream the butter, remaining sugar, vanilla and salt. Add the egg yolks, one at a time, beating well after each addition. Beat until the mixture resembles whipped cream. Stir the baking soda into the buttermilk. Sift together the flour and baking powder. Add the buttermilk and flour mixture to the butter mixture in half cup additions, ending with the flour mixture. Gently fold in the egg whites. Spoon the batter into prepared pans, bake for 40 minutes. Remove from the oven and cool in pans for 5-10 minutes. Turn out onto wire racks and cool completely.

Beat the cream cheese and the butter together, add the vanilla. Add the powdered sugar, a little at a time, beating until it reaches a creamy consistency. Add a tablespoon of buttermilk to thin, if needed.

Place one cooled layer on a cake plate, spread a layer of cream cheese frosting over top. Top with a layer of strawberry slices. Top with the second cake layer, cream cheese frosting and another layer of strawberry slices. Top with the final cake layer and stabilized with wooden skewers. Frost the cake with the remaining cream cheese frosting. Stabilize layers with straws or wood skewers and frost with remaining cream cheese frosting. Arrange sliced strawberries on top of the cake. Chill for three hours, bring to room temperature before serving.
Pin It Now!

Wednesday, July 16, 2014

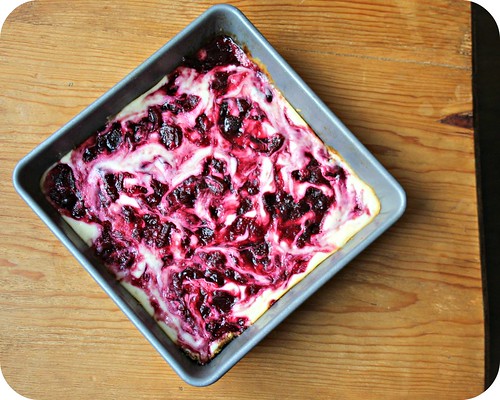
Cherry Cheesecake Bars

Cherry Cheesecake Bars
I finally invested in a cherry pitter
from Amazon and I am so glad I did. The best part is Miss F loves to operate it. I wish I had bought it years ago, especially since it was so cheap. Miss F loves cherries and loves making her hands pink from the cherries. I made these cheesecake bars based on a recipe from the Beverly Hills Market and Deli, but I made a few changes. These bars are super simple to make and I can't wait to try it with other summer berries. They are much easier than a cheesecake and have the same great taste.
Cherry Cheesecake Bars

1 cup graham cracker crumbs
3 tablespoons butter, melted
1 ¼ cup cherries, pitted and chopped
1 tablespoon sugar
1 tablespoon water
2 teaspoons lemon juice
½ teaspoon cornstarch
8 ounces cream cheese , softened
1⁄3 cup sugar
½ teaspoon vanilla
1 egg

Combine graham cracker crumbs and melted butter. Press into the bottom of an 8" square pan. Bake at 350 for 8-10 minutes. Cool. Reduce oven temperature to 325.

Meanwhile, combine cherries, 1 tablespoon sugar and water in a small saucepan. Bring to a boil; reduce heat and simmer until cherries are soft, about 5 minutes. Combine lemon juice and cornstarch. Stir into cherry mixture and cook until thickened. Remove from heat and cool slightly.

While cherry mixture is cooling, place cream cheese, sugar, egg and vanilla in a food processor. Process until smooth. Spread over cooled crust. Dollop cherry mixture over cream cheese layer. Cut through with a knife to swirl.

Bake at 325 for 30-35 minutes or until set. Cool on wire rack. Cover and chill at least 3 hours. Cut into 12 bars.
Pin It Now!

Wednesday, July 2, 2014

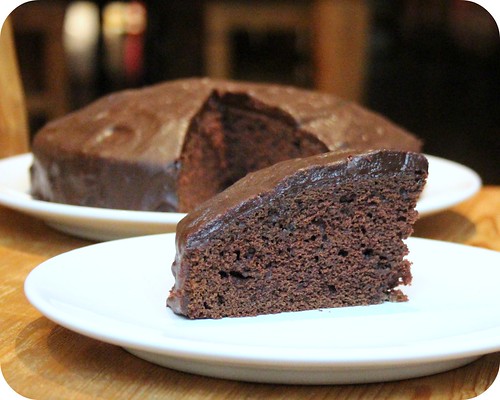
Chocolate Ganache Cake

Chocolate Ganache Cake
I love chocolate cake. It is one of my most favorite desserts. I made this to take to my parents house to eat after having a crab feast. The weather had different plans for us though, it was stormy all day, so Miss F and I stayed inside. We met friends for a game of bowling, went out for baked whole fish DIY spring rolls and ended the day with chocolate cake for dessert. Miss F made the batter completely herself, it was easy for her since no mixer is needed. She has it in her head that in order to eat the dessert, you have to help make the dessert. It really is quite cute! I adapted this recipe from Fine Cooking.
Chocolate Ganache Cake

1 cup all-purpose flour
¼ cup plus 2 tablespoons unsweetened cocoa powder
½ teaspoon baking soda
¼ teaspoon salt
½ cup unsalted butter, melted and warm
1 ¼ cups packed light brown sugar
2 large eggs
1 teaspoon pure vanilla extract
½ cup hot water
1/3 cup cream
¾ cup chocolate chips

Position a rack in the lower third of the oven and heat the oven to 350 degrees. Grease the bottom of an 8x2- or 9x2-inch round cake pan or line it with parchment.

In a small bowl, whisk the flour, cocoa powder, baking soda, and salt. Sift only if the cocoa remains lumpy after whisking. In a large bowl, combine the melted butter and brown sugar with a wooden spoon or rubber spatula. Add the eggs and vanilla; stir until well blended. Add the flour mixture all at once and stir just until all the flour is moistened. Pour the hot water over the batter; stir just until it’s incorporated and the batter is smooth. Scrape the batter into the prepared pan. Bake until a toothpick inserted in the center comes out clean, about 30 minutes for a 9-inch pan; 35 to 40 min. for an 8-inch pan. Let cool in the pan on a rack for 10 min. Run a thin knife around the edge and invert the cake (peel off the parchment if necessary). Invert it again onto the rack and let cool completely.

In a two cup measure, add the chocolate chips and cream. Microwave for 45 seconds, stirring every 15 seconds. Stir until all the chips are melted and the ganache is smooth.

Once cool, set the rack over a baking sheet or foil. Pour the warm ganache over the cake and use an icing spatula to spread it over the top of the cake and down the sides. Let set for about an hour before serving.
Pin It Now!
Related Posts Plugin for WordPress, Blogger...