Sunday
Monday
Tuesday
Wednesday
Thursday
Friday
Saturday
lattice chicken pot pie
Mexican street corn pasta
chicken Ghiveci
creamy chicken tortilla soup, jalapeno jack popovers
butter basted ribeyes, twice baked potatoes, broccoli
brisket tacos, pinto beans
pork souvlaki, naan

Monday, November 24, 2014

Cheddar Hamburger Buns

Cheddar Hamburger Buns
So this time next week you should have tons of leftover turkey. And these buns would be perfect for leftover turkey sandwiches, you don't even need to add cheese. Of course C and Miss F feel the need to add cheese to everything, mostly two slices if allowed. I actually served leftover chipotle pork on these rolls with barbecue sauce and the next day I had them as crabcake sandwiches with my mom's famous crabcake sauce. They worked great for both meals and I plan to be whipping up another batch for Thanksgiving leftovers. Miss F adored these rolls! Thanks to Confections of a Foodie Bride for the amazing recipe.
Cheddar Hamburger Buns

2 ¼ teaspoons yeast
1 cup lukewarm water
2 tablespoons vegetable oil
2 eggs
3 tablespoons sugar
3 ¼ cups flour
1 teaspoon salt
6 ounces sharp cheddar, shredded

Add warm water to the bowl of the stand mixer and sprinkle the yeast over top. Let sit for 5 minutes, until frothy. Add the, oil, 1 egg, and sugar to the bowl. Add the flour, salt, and cheese and mix on medium-low speed with the hook until the dough holds together, about 2 minutes. The dough should clean the sides of the bowl. If not, add additional flour by the tablespoon. Increase speed to medium and knead the dough for 5 minutes. Transfer the dough to a large bowl that has been lightly greased with oil. Cover it with a damp towel and let rise in a warm place until doubled in bulk, 1 to 1 ½ hours. Line a baking sheet with parchment paper or a Silpat. Turn out the dough onto a lightly floured surface. Divide the dough in half, divide each halve in half and then divide the quarters in half again, you will have 8 buns. Roll into rounds and flatten with the palm of your hand onto the baking sheet; placing buns about 1 inch apart. Cover with a damp towel and let them rise for 20 minutes + oven preheating time. Preheat oven to 350 degrees. Whisk the remaining egg with 1 tablespoon water. Brush the buns with the egg wash and bake for 20 to 30 minutes, until golden brown. Let cool 10 minutes before slicing and serving. Store leftovers in a zip-top bag at room temperature.
Pin It Now!

Friday, November 21, 2014

Salsa Verde Chicken Tacos

Salsa Verde Chicken Tacos
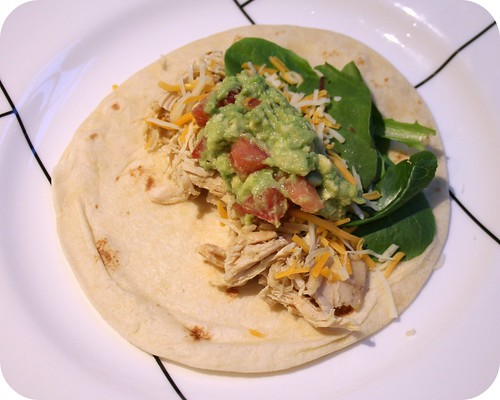
I had a jar of salsa verde in the refrigerator that needed to be used. And I always love my go to, crockpot chicken soft tacos, but I wanted to make something different and ditch the seasoning packet for good. I swapped out the Rotel for salsa verde, fresh jalapeno and onion, with some lime juice added.  It couldn't be easier and I really want to try the original recipe without the seasoning packet.  Miss F has been quite a fan of making her own tacos lately.  A little chicken, a little guacamole, tons of beans and even more cheese.  It is quite a mess.
Salsa Verde Chicken Tacos

2 tablespoons olive oil
1 pound boneless skinless chicken breasts
½ small onion, chopped
½ jalapeno, seeded and chopped
juice from ½ lime
½ cup salsa verde
½ cup chicken broth
½ teaspoon cumin
½ teaspoon salt

12 tortillas, warmed
guacamole
sour cream
shredded lettuce
shredded cheese

Pour the olive oil into the crockpot. Add the chicken, onion and jalapeno. In a two cup measure, stir together the lime juice, salsa, broth, cumin and salt. Pour over the chicken, cover and cook on low for 6 to 8 hours. Remove the chicken from the crockpot and shred with two forks, return the chicken to the crockpot and increase the heat to high. Cook for an additional 20 minutes. Serve the chicken on warmed tortillas topped with guacamole, sour cream, lettuce and shredded cheese.
Pin It Now!

Wednesday, November 19, 2014

Rustic Pear Tart

Rustic Pear Tart
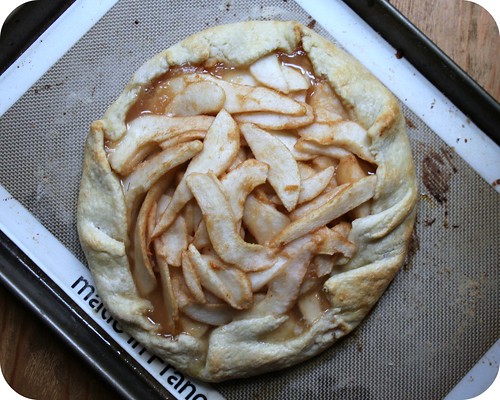
I had four pears sitting on my counter due to a coupon and a great sale. I knew I wasn't going to be able to eat them all before they got overripe, so the Rustic Pear Tart was born. I used Martha Stewart's recipe for the pastry dough, it is my go to and never lets me down. The key is overflouring your board when you roll out the dough, it really makes it easier to work with. A tip for peeling the pears is to blanche them for 15 seconds or so, the skin peels right off after. I learned this trick when I made Miss F's baby food and it works great on other fruits too, like peaches, plums and nectarines. This tart came together very quickly, within an hour and a half we were eating warm pear tart with vanilla ice cream. I may make one with apples for Thanksgiving, since it was so easy.
Rustic Pear Tart

1 ¼ cups flour
1 teaspoon sugar
½ teaspoon salt
½ cup butter
2 to 4 tablespoons ice water

4 pears, peeled, cored and sliced
juice from one lemon
¼ cup sugar
½ teaspoon cinnamon
pinch nutmeg
1 tablespoon cream
1 teaspoon sugar

Add the flour, sugar and salt to the bowl of the food processor. Process for 15 seconds. Cut the butter into small cubes and add to the flour mixture. Pulse for 30 seconds, until the mixture is pea sized crumbles form. Stream the water through the feed tube and add until the dough comes together. Transfer to a plastic bag and refrigerate for an hour.

Toss the pear slices with the lemon juice, sugar, cinnamon and nutmeg. Stir to coat.

Preheat the oven to 400 degrees. Roll out the pastry dough into a 10" circle and transfer to a Silpat lined baking sheet. Pour the pear mixture into the center of the dough round and carefully turn the edges up over the pear mixture, working around in a circle until all edges are folded over the pears. Brush the folded over edges with cream, then sprinkle with the teaspoon of sugar. Bake for 25 to 30 minutes. Serve warm with vanilla ice cream.
Pin It Now!

Monday, November 17, 2014

Crockpot TexMex Chicken Stew

Crockpot TexMex Chicken Stew
This dish reminded me of our family favorite, Crockpot Chicken Enchilda Soup. Miss F was a huge fan of this, but didn't like it served over the rice, she preferred hers straight.  This is a perfect winter meal, throw everything in the crockpot in the morning and prep the rice after you shred the chicken, dinner is served.  This will definitely go into my recipe box for the days when Miss F's after school activities keep us out late.  It is so nice to come home to a house that smells great and dinner is ready.  Thanks to Pink Parsley for the inspiration.
Crockpot TexMex Chicken Stew

½ yellow onion, minced
1 green bell pepper, seeds and ribs removed, chopped
2 cups frozen corn
1 (15-oz) can black beans, drained and rinsed
1 jalapeno, seeds and ribs removed, minced
3 garlic cloves, minced
2 cups chicken broth
1 (14.5 oz) can Rotel, diced tomatoes with chiles
2 tablespoons corn starch
1 tablespoons brown sugar
1 tablespoon tomato paste
2 teaspoons chile powder
1 ½ teaspoons ground cumin
1 ½ pounds boneless, skinless chicken thighs, trimmed of excess fat
1 minced chipotle chile in adobo sauce
¼ cup minced fresh cilantro
2 cups white rice

Add the onion, bell pepper, corn, beans, jalapeno and garlic to the crockpot. Whisk together the broth, Rotel, corn starch, sugar, tomato paste, chile powder and cumin. Pour the broth mixture into the crockpot, stir to combine. Season the chicken with salt and pepper and nestle the chicken thighs to the crockpot . Cover and cook on low for 4 to 6 hours.

Remove the chicken from the crockpot and shred with two forks. Return the chicken to the crockpot and stir in the chipotle. Cover and cook on high for 10 minutes more. Prepare the rice per package instructions. Serve the rice with the chicken spooned over top, top with cilantro.
Pin It Now!

Friday, November 14, 2014

Balsamic Pear Salad

Balsamic Pear Salad
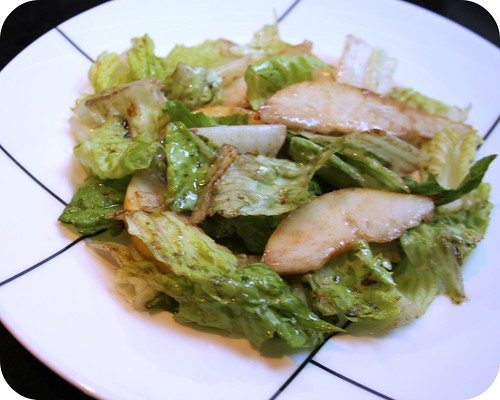
Miss F has been eating salad more often, which means I have been eating salad more often. There were gorgeous pears at the grocer this week and this salad was the perfect way to showcase them. I was shocked when C devoured the whole thing, I never figured him to be a pear-salad loving guy. Sweet balsamic dressing is one of my most favorite salad toppings and it works beautifully with fall pears.  I used Anjou pears, but Bosc pears would work just as nicely.
Balsamic Pear Salad

3 tablespoons balsamic vinegar
1 tablespoon Dijon mustard
1 tablespoon brown sugar
½ cup olive oil
4 cups chopped romaine
1 pear, sliced
¼ onion, thinly sliced

Whisk together the vinegar, mustard and sugar. Stream in the olive oil, whisking constantly. Toss the romaine, pears and onion with the dressing. Serve.
Pin It Now!

Wednesday, November 12, 2014

Seared Salmon Salad with Avocado Vinaigrette

Seared Salmon Salad with Avocado Vinaigrette
All salads need avocado in them. I could probably eat any combination of vegetables and with lettuce as long as there were chunks of avocado nestled somewhere in the greens. I first discovered avocado vinaigrette in a recipe swap I participated in. This salad is simple and delicious, perfect for night's when C is out and it is just Miss F and myself. She will eat salad, but only with ranch dressing. She is okay with salmon, but it isn't her most favorite fish. Her favorite fish is fish sticks, go figure. I tried one the other day, I hadn't had one since I was a kid. They were pretty much breaded bread, not an ounce of fish inside.
Seared Salmon Salad with Avocado Vinaigrette

1 avocado
½ teaspoon sugar
¼ teaspoon salt
1 tablespoon freshly squeezed lime juice
1 tablespoon water
2 teaspoons rice wine vinegar
3 tablespoons olive oil

½ pound salmon, portioned into 2 filets
2 tablespoons olive oil
salt and pepper

4 cups mixed greens

Peel, seed, and dice avocado and place half of it in blender or food processor. Add sugar, salt, lime juice, water, and vinegar. With the machine running, slowly drizzle in oil until a creamy emulsion forms.

Rub the salmon filets with the oil and generously season with salt and pepper. Heat a skillet over medium high heat, add the salmon to the pan skin side down and sauté for 3 to 5 minutes. Flip the salmon over and sauté for 3 to 5 minutes more, until the salmon is cooked through.

Toss the mixed greens and remaining diced avocado with the vinaigrette. Divide among two plates and top each with the cooked salmon filet. Serve.
Pin It Now!

Monday, November 10, 2014

Baked Tequila Lime Chicken Fajitas

Baked Tequila Lime Chicken Fajitas
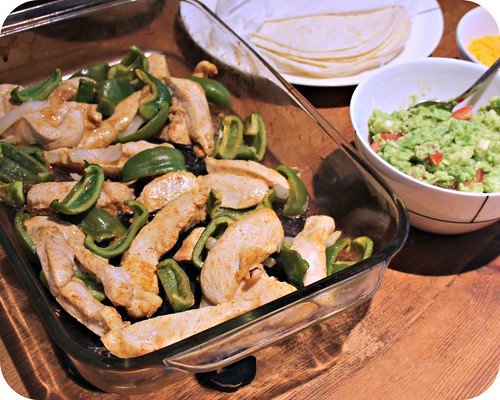
This recipe was inspired from Confections of a Foodie Bride, but sadly, I do not have a grill, so I had to adapt the recipe a bit. I am a big fan of baking fajitas because it makes things so very easy. While the fajitas are baking, you can warm the tortillas, prepare the guacamole and try to keep Miss F from eating all of the shredded cheese before dinner is served. The marinade is great, how could it not be? Tequila and lime juice is pretty much perfection.  Margarita fajitas!
Baked Tequila Lime Chicken Fajitas

Juice of 2 limes
2 tablespoons tequila
1 teaspoon chile powder
1 clove garlic, sliced
2 tablespoons olive oil
Pinch of salt
1 pound chicken breasts
2 bell peppers, sliced
1 onion, sliced
12 tortillas
grated Colby Jack cheese
guacamole
sour cream

Whisk together the lime juice, tequila, chile powder, garlic, olive oil and salt. Add the chicken breasts to a large resealable plastic bag and pour the marinade overtop. Allow to marinate for an hour or more.

Preheat the oven to 400 degrees. Slice the marinated chicken breasts into strips and add to a 9x13 baking dish. Add the bell pepper and onions to the dish, pour the marinade over top and toss to coat. Bake for 20 to 25 minutes. Serve in warm tortillas topped with cheese, guacamole and sour cream.
Pin It Now!

Friday, November 7, 2014

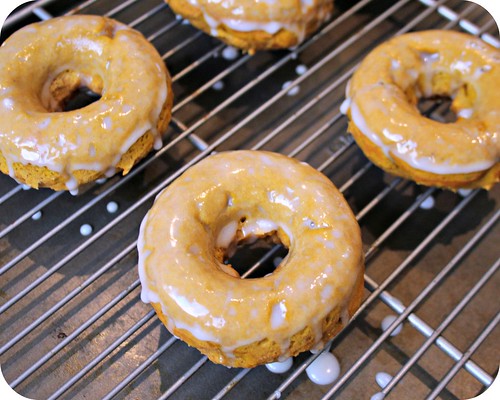
Baked Pumpkin Iced Doughnuts

Baked Pumpkin Iced Doughnuts
Miss F loves doughnuts for breakfast, they are about her most favorite breakfast treat. Though, she really loves all breakfast foods, which is the exact opposite of me. I don't really love many traditional breakfast foods, but I do adore doughnuts. These doughnuts are perfect for fall and Miss F approved.  This recipe makes six doughnuts using the Wilton doughnut pan.  Seriously, it has been one of my best kitchen investments ever.  And by investment, I mean it costs less than a dozen doughnuts. Thanks to the Redhead Baker for the inspiration!
Baked Pumpkin Iced Doughnuts

1 cup flour
1/3 cup sugar
1 tablespoon butter, melted
1 teaspoon baking powder
1 teaspoon ground cinnamon
¼ teaspoon nutmeg
pinch ginger
pinch cloves
½ teaspoons salt
1/3 cup canned pumpkin
1 egg
1 teaspoon vanilla extract

For the glaze:
1 tablespoon milk
½ cup confectioners’ sugar

Preheat oven to 400 degrees. Spray the doughnut pan with non-stick cooking spray. Stir together the flour, sugar, butter, baking powder, cinnamon, nutmeg, ginger, cloves, salt, pumpkin, egg and vanilla in a mixing bowl. The dough will be quite thick. Spoon the batter into the doughnut pan, making sure it is evenly distributed. Bake for 10 to 12 minutes, until the doughnut springs back to the touch. Cool on a wire rack. While the doughnuts are cooling, whisk together the milk and confectioners' sugar. Dip each cooled doughnut into the glaze and allow the glaze to set. Serve.
Pin It Now!

Wednesday, November 5, 2014

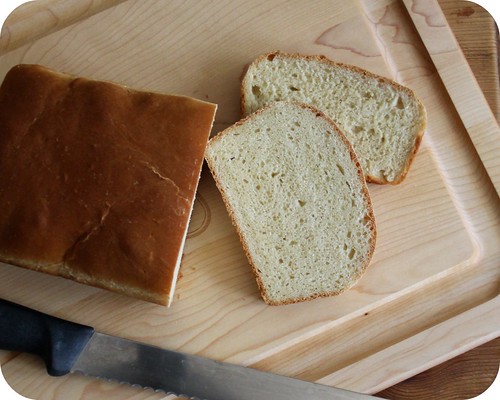
American Sandwich Bread

American Sandwich Bread
I decided to double the recipe from Confections of a Foodie Bride so I could have a loaf for us and a loaf for my parents.  The kneading portion was interesting, it climbed up the dough hook and nearly overtook my KitchenAid.  One loaf at a time in the future, that is for sure.  This bread is perfection.  It is great for sandwiches, with a drizzle of honey or even on its own (with butter, of course.)   Miss F was a huge fan of this bread for her lunchbox.  I will fully admit that I nearly ate the entire loaf.  Miss F had a sandwich or two, but the rest was all mine.  No regrets.
American Sandwich Bread

1/3 cup warm water
2 ¼ teaspoons dry active yeast
1 cup warm milk
3 tablespoons sugar
2 tablespoons butter, melted (I microwave it with the milk)
2 teaspoons salt
3 ½ cups flour
Oil or cooking spray for greasing bowl and loaf pan

Add the water to the bowl of the stand mixer, sprinkle the yeast overtop and proof for 5 to 7 minutes, until frothy. Add the milk, sugar, butter, salt and flour, mix at low speed until combined. Swap out the mixer attachment for the dough hook and need for 8 minutes more. Transfer to a lightly oiled bowl and allow to rise in a warm place for 45 minutes. Grease the loaf pan with cooking spray. Press the dough into a 1" thick rectangle approximately 9" long, then roll into a cylinder. Crimp the bottom edge of the dough and lightly press it into the pan. Allow to rise for 30 minutes more. Preheat the oven to 350 degrees. Bake for 45 minutes, until golden brown. Let cool in the pan for 5 minutes, then turn out onto a rack to cool completely.
Pin It Now!

Monday, November 3, 2014

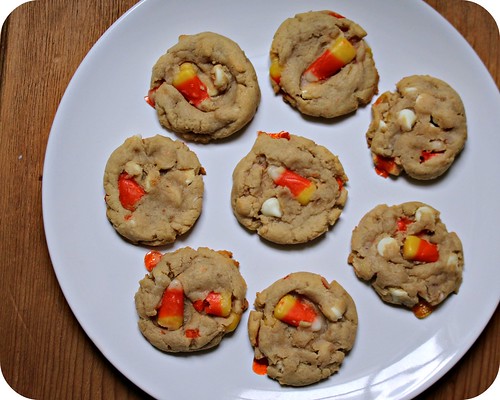
Candy Corn Cookies

Candy Corn Cookies
I hope everyone had a wonderful Halloween with lots of treats, no treats. Miss F and I made a cake version of the candy corn cupcakes for her school carnival's cake walk. We had about a half of bag of candy corn left over, so I went searching for a cookie recipe to use up the remainder.  Miss F loved these cookies, they were perfect for the leftover candy corn.  Be sure to line the cookie sheets since the candy corn melts and can be a bit sticky.  Thanks to Averie Cooks for the fantastic recipe.  Our house is now candy corn free, but we have a plastic pumpkin full of candy from trick or treating.  Luckily, Miss F's school is collecting excess candy to donate to the Ronald McDonald house.
Candy Corn Cookies

½ cup butter, softened
¾ cup light brown sugar, packed
¼ cup sugar
1 egg
1 tablespoon vanilla extract
2 tablespoons cream
2 cups flour
2 teaspoons corn starch
1 teaspoon baking soda
pinch salt, optional and to taste
1 ½ cups candy corn (10 to 11 ounces)
1 cup white chocolate chips

Cream together the butter, sugars, egg and vanilla on medium-high speed until light and fluffy, about five minutes. Add the cream, flour, corn starch, baking soda and soda. Mix on low speed for one minute more. Stir in the candy corn and white chocolate chips. Use a 2" cookie scoop, form two tablespoon mounds on a plate. Refrigerate the cookie dough mounds for at least three hours.

Preheat the oven to 350 degrees. Line a baking sheet with a Silpat or parchment paper, place the refrigerated mounds 2" apart on the sheet, making sure the candy corn is not touching the cookie sheet. Bake for 9 minutes, until edges have set. Cool the cookies on the baking sheet for 5 minutes, then transfer to a wire rack to cool completely.
Pin It Now!
Related Posts Plugin for WordPress, Blogger...