Sunday
Monday
Tuesday
Wednesday
Thursday
Friday
Saturday
lattice chicken pot pie
Mexican street corn pasta
chicken Ghiveci
creamy chicken tortilla soup, jalapeno jack popovers
butter basted ribeyes, twice baked potatoes, broccoli
brisket tacos, pinto beans
pork souvlaki, naan

Wednesday, May 30, 2012

Tomatillo Chicken Tacos

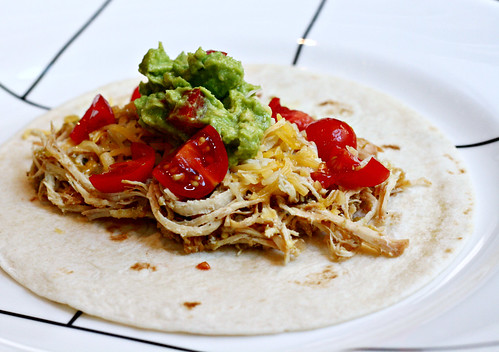
tomatillo chicken tacosFor the longest time I was obsessed with Crockpot Chicken Tacos. I used the filling in so many things: Chicken Taquitos, Cheesy Chicken Tortilla Cups, and Baked Chicken Chimichangas.  I was ready for a change.  And I was ready to abandon the seasoning packet.  I love tomatillos, they are incredibly cheap and add so much flavor.  I started cooking with them from a can, but now I buy them fresh, they are so easy to roast.  This recipe could not get any easier, toss everything in the crockpot and let it simmer away.  Miss F was eating the meat like crazy, she didn't even mind the green stuff.
Tomatillo Chicken Tacos

2 boneless skinless chicken breasts
6 tomatillos, husked and quartered
½ onion, chopped
½ jalapeno, chopped
2 cloves garlic, smashed
¾ cup chicken broth
½ lime
1 teaspoon cumin
½ teaspoon oregano
1 teaspoon salt
½ teaspoon pepper

Place the chicken in the bottom of your crockpot. Layer the tomatillos, onions, jalapenos and garlic overtop of the chicken. Pour the chicken broth into a 1 cup measure. Add the juice from half a lime, cumin, oregano, salt and pepper to the chicken broth; stir to combine. Pour the chicken broth over the chicken in the crockpot. Cook on low for 7 to 8 hours. Remove the chicken from the crockpot and shred with two forks. Return the shredded chicken to the crockpot and cook for 30 minutes more. Serve with warm tortillas, sour cream, guacamole, cheese and tomatoes.
Pin It Now!

Monday, May 28, 2012

Secret Recipe Club: Citrus-Garlic Roasted Chicken

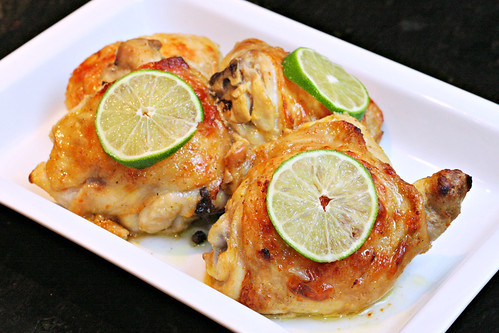
Citrus Garlic Roasted ChickenIt's that time of the month again, time for another post for the Secret Recipe Club. This month I received the blog A Healthy Jalapeno in the swap. I had so much fun reading through her blog and discovering her fantastic (and healthy) recipes. Citrus-Garlic Roasted Chicken seemed like a great dish for summer. If we had a grill, I would be making this on it. Maybe next time I visit my parents I will borrow their grill to make this dish. Her original recipe only marinated the chicken for only 30 minutes.  I knew we were going to be out all day, so I went ahead and marinated the chicken all day.  The citrus flavor was beautiful, perfectly bright.  I couldn't get enough of the chicken, especially the crispy skin.  Miss F was a huge fan, as was C.  This will be going into our dinner routine for sure.
Citrus-Garlic Roasted Chicken

4 large whole chicken thighs
½ navel orange, zested, plus the juice of 1 whole orange
1 limes, zested and juiced
¼ cup extra-virgin olive oil
2 large cloves garlic, peeled and smashed
½ teaspoon kosher salt, plus more for seasoning
Freshly cracked black pepper

Put the chicken in a large Ziploc bag. In a large measuring cup, add the orange juice, lime juice, orange zest and lime zest. Whisk in the olive oil, garlic, salt, and a generous grind of black pepper. Pour the marinade over the chicken. Refrigerate for 30 minutes to 8 hours.

Preheat the oven to 375 degrees. Put a rack on a rimmed baking sheet. With tongs, remove the chicken pieces from the marinade and arrange them on the rack leaving space between each piece. Drizzle a small spoonful of the marinade over the top of each chicken piece; season well with salt and pepper, to taste.

Roast until the chicken is cooked through and the juices run clear when meat is pierced with a knife, about 45 minutes. Serve with fresh lime slices.


Pin It Now!

Friday, May 25, 2012

Strawberry Tres Leches Cake

strawberry tres lechesTres Leches is one of C's favorite desserts. So when we had an abundance of strawberries from our two picking trips to Froberg Farms, I decided to try and incorporate strawberries into the dessert. Turns out there is not a single recipe in cyberspace that adding strawberries to Tres Leches, other than as a garnish. I decided that macerating the strawberries and layering them between the cake and whipped cream would be a good solution. It was! My parents recently moved to Texas and had never tasted Tres Leches before, so I brought it with us to a barbecue at their new home. This cake was a comedy of errors during preparation. Our extra refrigerator decided to die and while I was trying to make the whipped cream topping, I was also trying to consolidate our freezer (we had to throw out so much food.) The stress of the situation kept making me forget about the mixer. So I made butter. Twice. Third time was the charm and the cake was done. And it was also decided that we would be eating turkey from the freezer that week, whether I wanted to or not.
Strawberry Tres Leches Cake

4 large eggs, separated
1 1/3 cups granulated sugar
1 1/3 cups all-purpose flour
1 ½ teaspoons baking powder
3 tablespoons whole milk
½ teaspoon vanilla extract

Milk topping:
1 14-ounce can evaporated milk
1 14-ounce can sweetened condensed milk
½ cup heavy cream

Strawberries:
1 pound strawberries
1 tablespoon sugar

Frosting:
2/3 cup heavy cream
1/4 cup powdered sugar

To make the cake: Preheat the oven to 350 degrees F. Lightly grease and flour a 9 by 9-inch baking dish and set aside.

In the bowl of a mixer, beat the egg whites on low speed until soft peaks form. Add the sugar gradually with the mixer running and peak to stiff peaks. Add the egg yolks 1 at a time, beating well after the addition of each.

Sift together the flour and baking powder and add to the egg mixture, alternating with the milk. (Do this quickly so the batter does not lose volume.) Add the vanilla. Bake until golden, 30 minutes.

To make the milk topping: In a blender, combine the evaporated milk, condensed milk, and heavy cream and blend on high speed. Whisking works as well and doesn't dirty your blender

Remove the cake from the oven and while still warm, prick the cake with a skewer several times and pour the cream mixture over it. Let sit and cool to room temperature.

Hull the strawberries. Crush the strawberries and toss with one tablespoon sugar. Set aside for 5 minutes. Spread the strawberries over the cooled cake.

Whip the cream and powdered sugar until soft peaks form. Top the cake with the whipped cream. Cover and refrigerate until well chilled, at least 4 hours or overnight.
Pin It Now!

Wednesday, May 23, 2012

Mini Corn Dog Muffins

mini corn dog muffinsWhen I saw this recipe on The Jey of Cooking, I pinned it on Pinterest immediately.  I thought they would be a perfect toddler snack and even more perfect for Miss F's lunch box.  Miss F helped me scoop, pour and stir the batter.  She was so excited to help so much in the kitchen.  She was a bit disappointed that we didn't use muffin liners, placing them is her favorite part of baking.  After they had cooled a bit she ate one and declared them delicious.  Then she started on her second, peeling off the breading and just eating the hot dog.  She did that 11 more times.  That's right, 11 mini muffin breading remnants on her plate.  So much for adding these to her lunchbox, I have a carnivore through and through.
Mini Honey Corn Dog Muffins
makes 24 bite sized muffins

2 tablespoons butter, melted
2 tablespoons natural applesauce
¼ cup sugar
1 teaspoon honey
1 egg
½ cup buttermilk
¼ teaspoon baking soda
½ cup cornmeal
¼ cup flour
¼ cup whole wheat flour
¼ teaspoon salt
4 hot dogs, each cut into 6 equal pieces

Preheat oven to 375. Spray a mini-muffin tin with non-stick spray.

Combine butter, applesauce, sugar and honey in a bowl and mix until combined. Add the eggs, mix again, then add the buttermilk and stir together until smooth. In a separate bowl, mix together the baking soda, cornmeal, flours and salt. Add half of the mixture to the wet ingredients, stir until combined, then add the remaining half and stir again.

Spoon 1 tablespoon of batter into each mini-muffin cup. Nestle one hot dog piece into the middle of each cup. Bake for 10-12 minutes until the cornbread is golden brown. Cool in the muffin tin for 5 minutes then transfer whatever is not being served to a cookie rack.

Store the leftovers in the refrigerator. To reheat, microwave for 20-30 seconds. If reheating from frozen, microwave for 1-2 minutes, until warm all the way through.

reprinted with permission
Pin It Now!

Monday, May 21, 2012

Chocolate Swirl Peanut Butter Cookies

chocolate swirl peanut butter cookiesI envy neat bakers. I really do. Look how beautiful these cookies look on Salad in a Jar.  I have no idea how she got them to be so beautifully round.  I took so much care rolling up the dough and chocolate, but the round shape was overcom with gravity while the dough log chilled.  No matter, the cookies still tasted amazing.  Chocolate+peanut butter always makes a cookie worth eating, no matter how they look.  I cut the cookies a little thicker than 1/4 inch, so the recipe only made four dozen for me and needed a minute or two more to bake.
Chocolate Peanut Butter Pinwheels

½ cup butter, softened
1 cup sugar
½ cup peanut butter
2 tablespoons milk
½ teaspoon vanilla extract
1 egg
1 ¾ cup all-purpose flour
½ teaspoon salt
½ teaspoon baking soda
1 cup semi-sweet chocolate chips

Cream the butter and sugar until light and fluffy. Beat in the peanut butter, milk, vanilla extract, and egg. Stir in flour, salt, and baking soda.

In a small microwave safe bowl, microwave the chocolate chips for one minute, stirring after 30 seconds and set aside.

Press the dough into a ball and place between two sheets of waxed paper. Roll out into a 10 x 17 inch rectangle. Remove the top piece of waxed paper and spread the cooled chocolate over the top. Starting with the long side, roll up the dough with chocolate inside. Chill for 30 to 45 minutes.

Meanwhile, preheat oven to 375 degrees. Prepare your cookie sheets with silicone baking mats or parchment paper. Slice the chilled roll into ¼ inch thick slices and place onto the prepared cookie sheet. Bake for 10-12 minutes. Transfer to a cooling rack while still warm.
Pin It Now!

Friday, May 18, 2012

Artichoke and Spinach Crusted Chicken

spinach and artichoke crusted chickenI saw a recipe for Artichoke Crusted Chicken on Pinterest. It sounded good, but I wanted to streamline the recipe and add some spinach to the mix. The result was an easy weeknight meal that involves minimal prepwork and hands on time. The dream, right? Until C and Miss F both picked off the artichoke topping. Miss F I can understand, she is my meat loving girl, but C? I asked him what on earth was wrong with artichokes, spinach and cheese. His response was that it was too rich. Ha! This from the man who would be happy eating chicken pot pie every night for dinner. So this goes down as another great recipe that I will never get to cook for my family again. Add it to the vault.
Artichoke and Spinach Crusted Chicken

¼ cup mayonnaise
¼ cup grated Parmesan cheese
1/3 cup shredded Mozzarella cheese
1/3 cup artichoke hearts, chopped
½ cup baby spinach
Squeeze of fresh lemon juice
Dash of hot sauce
4 boneless skinless chicken breasts

Preheat the oven to 425 degrees. Spray a glass baking dish with cooking spray. In a small bowl, combine the mayonnaise, Parmesan, Mozzarella, artichokes and spinach. Add the lemon juice and hot sauce. Salt and pepper to taste. Place the chicken breasts in the greased baking dish. Top each piece of chicken with ¼ of the artichoke mixture. Bake for 30 to 40 minutes, until chicken is cooked through and the topping is beginning to brown and bubble.
Pin It Now!

Wednesday, May 16, 2012

Caramelized Onion, Spinach and Goat Cheese Pizza

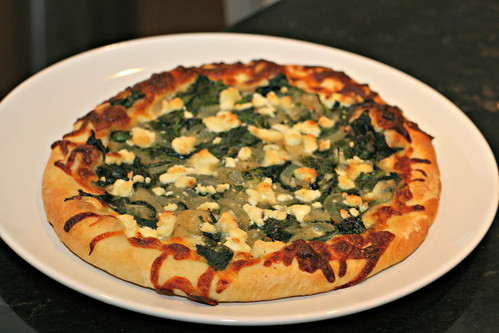
caramelized onion brie and spinach pizzaThis was another pizza from the wine exchange I hosted. I have used caramelized onions often in appetizers, like caramelized onion bruschetta and caramaelized onion dip. I was trolling the internet looking for a way to translate this to a pizza and I discovered this recipe on Foodess.  It seemed like the perfect way to serve sweet caramelized onions on a pizza.  To make things easier, I prepared the onion and spinach pizza the day before the party and stored it in an airtight container.  That way, all I had to do was top the pizza when it came to party time.  We still didn't end up eating pizza until 10 pm, but that is a whole different story.
Caramelized Onion, Spinach and Goat Cheese Pizza

1 large sweet yellow onion (about 1 pound), halved and thinly sliced
3 tablespoons butter
1 tablespoon white wine vinegar
2 cups baby spinach
Your favorite pizza dough
½ cup shredded mozzarella
¼ cup shredded Parmesan
3 tablespoons soft goat cheese

Place your pizza stone in the oven and preheat the oven to 450 degrees. In a large skillet, heat the butter over medium heat. Add onions and cook over low heat until softened and caramelized. Add the vinegar and stir to combine. Season to taste with salt and pepper. Add the spinach and sauté until wilted.

Prepare your pizza crust on a piece of parchment paper. Brush dough with olive oil and top with the mozzarella, Parmesan, onions and spinach. Dot with the goat cheese. Transfer the pizza with the parchment paper to the oven and bake for 15 minutes, until golden brown and bubbly.
Pin It Now!

Monday, May 14, 2012

Mom's Rosemary Roasted Red Potatoes

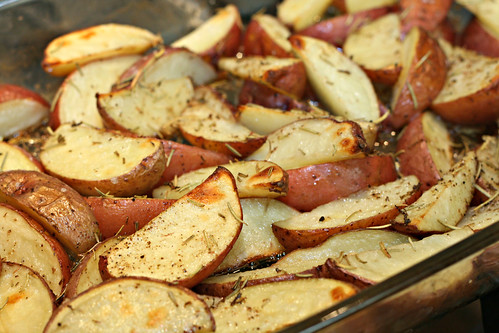
mom's rosemary roasted potatoesI have had these potatoes more times than I can count.  Sometimes they are tossed with fresh dill, sometimes they are tossed with parmesan and pepper, but my favorite preparation is with rosemary.  My mom has been making this as a side dish for as long as I can remember.  Whatever herb she had fresh from her garden is what the potatoes were tossed with.  They are a simple side and C is a big fan of them.  Miss F stands firm in her inexplicable hatred of potatoes and refuses to eat them.  Maybe one day soon she will come around to the deliciousness of potatoes...
Mom's Rosemary Roasted Red Potatoes

2 tablespoons butter
8 to 10 red potatoes, cut into eighths
1 teaspoon rosemary

Preheat oven to 425. Add butter to a 10x13 glass baking dish. Melt the butter in the oven while it preheats. Toss the potatoes in the melted butter and rosemary. Salt and pepper to taste. Roast potatoes for 35 to 40 minutes.
Pin It Now!

Friday, May 11, 2012

Apricot, Brie and Arugula Pizza

apricot brie & arugula pizzaThis was probably my most favorite pizza I served during the wine exchange. I got the idea when I saw Pioneer Woman topped a fig pizza with arugula. One of my most favorite appetizers to serve is apricot baked brie.  I figured it would translate well to a pizza and I was right.  I could have eaten the whole pie myself, in fact, I believe I traded away a slice of the prosciutto and sausage pizza (I don't really go for meat on pizza) for another slice of this pizza. Major thanks go to my friend Courtney for suggesting tossing the arugula with truffle oil, which was completely genius and really sent this pizza to a whole new level.
Apricot, Brie and Arugula Pizza

1 recipe of your favorite pizza crust
1 cup apricot jam
½ teaspoon salt
Your favorite pizza dough
½ pound Brie, sliced thinly
1 cup arugula
2 teaspoons champagne vinegar
1 teaspoon truffle oil

Place your pizza stone in the oven and preheat to 450 degrees. Microwave the jam and salt in a small microwave safe dish for a minute, stirring after 30 seconds. Prepare your pizza crust on a piece of parchment paper. Spread the jam on the pizza crust and top with the Brie. Transfer the pizza on parchment to the pizza stone and bake for 10 minutes, until golden brown and bubbly. Meanwhile, toss the arugula with the vinegar and truffle oil. Top the warm pizza with the arugula, slice and serve.
Pin It Now!

Wednesday, May 9, 2012

Chicken Pot Pie Soup

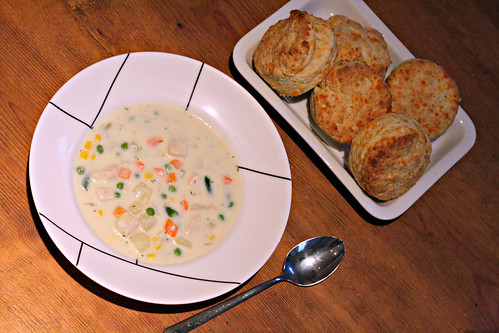
chicken pot pie soupI saw a recipe for Chicken Pot Pie Soup from Skinny Taste on Pinterest. I was intriqued since my husband C loves chicken pot pie more than any other dish that I make. I knew that the recipe would be a hit, especially if I fattened it up a bit.   The soup was perfect, just like chicken pot pie.  C and Miss F both dunked their sour cream cheddar biscuits in the soup to make their own personal chicken pot pies.  I was most excited to find the frozen vegetable mix with lima beans in it at HEB.  Kroger had stopped adding lima beans to their frozen vegetable mix, so it looks like I will be making trips to HEB to get lima beans for our chicken pot pies.
Chicken Pot Pie Soup

1 potato, cut into bite sized pieces
¼ cup butter
½ onion, chopped
1 clove garlic, minced
¼ cup flour
2 cups chicken broth
3 ½ cups milk
½ cup cream
2 boneless skinless chicken breasts cut into bite sized pieces
1 teaspoon dried parsley
½ teaspoon dried thyme
1 package frozen vegetable mix (peas, carrots, corn, beans, lima beans)

In a small pot, cover potatoes with water and bring to a boil. Reduce the heat to medium and simmer for 10 minutes until potatoes are soft. Drain and set aside.

In a Dutch oven, heat butter over medium heat. Add onion and cook until translucent, about 3 minutes. Add garlic and cook for 30 seconds, or until fragrant. Whisk in the flour until well combined and cook for 1 minute more. Whisk in the chicken broth until the mixture begins to thicken. Stir in the milk and cream. Add the chicken, parsley and thyme. Simmer for 20 minutes. Add the vegetables and potatoes, simmer for 5 to 7 more minutes, until heated through. Serve.
Pin It Now!

Monday, May 7, 2012

Spinach Basil Pesto Baked Shrimp

spinach basil pesto baked shrimpI knew I wanted to have shrimp as an appetizer at the wine exchange. Since we were having pizza as the entree, I wanted something with an Italian flavor. I love pesto, but I am allergic to tree nuts, so I always have to make my own. A cheaper alternative to basil pesto is adding in spinach to help bulk up the pesto. I like to buy baby spinach at the salad bar, it is so much cheaper than buying it in the produce department and you can buy as small an amount as you wish. I came up with this recipe and was so proud of myself, until I realized that the shrimp had their shells on. Even though I requested tail on only shrimp at the seafood counter. And after I had already coated each one in pesto and Panko. Luckily, two friends were over early for the party and they helped me peel the shrimp in no time.
Spinach Basil Pesto Baked Shrimp

½ cup baby spinach leaves
¼ cup fresh basil leaves
¼ cup grated Parmesan cheese
1 clove garlic, peeled
1 teaspoon lemon juice
3 tablespoons extra-virgin olive oil
½ cup Panko breadcrumbs
1 pound peeled shrimp

Preheat your oven to 450 degrees. Grease a 9x13 glass baking dish with cooking spray. In the bowl of your food processor, add the spinach, basil, cheese, garlic and lemon juice. Pulse until well combined. Stream in one tablespoon of the olive oil with the processor running and then transfer the mixture to a shallow dish. Stir in the remaining olive oil and Panko. Take the shrimp and coat with the Panko-Pesto mixture and place in a single layer in the greased baking dish. Once all the shrimp are coated, bake for 5 to 10 minutes, until shrimp are cooked through. Cooking time will vary based on the size of your shrimp.
Pin It Now!

Friday, May 4, 2012

Recipe Swap: Maple Oatmeal Pancakes

maple oatmeal pancakesThis week's recipe swap was Blogger's Choice style. I received the blog Ommy Noms in the swap and I was so excited to go through all her fantastic recipes to find one for the swap. I was drawn to this pancake recipe because I know how much Miss F loves oatmeal and how much she loves pancakes.  After making these gorgeous pancakes, I realize I may have underestimated her love.  As I type this, she is currently eating her third pancake.  And she ate a cup of strawberries and a clementine with it.  I wonder if she will ask for a fourth before I publish this post.  Thanks to A Taste of Home Cooking for coordinating the swap.  Yep...she just asked for another...
Maple Oatmeal Pancakes

½ cup flour
½ cup quick-cooking rolled oats
1 tablespoon brown sugar
1 teaspoon baking powder
½ teaspoon baking soda
½ teaspoon salt
¾ cup milk
1 teaspoon maple syrup
2 tablespoons vegetable oil
1 egg

Combine flour, oats, brown sugar, baking powder, baking soda, and salt in a medium bowl. Stir to combine. Add milk, maple syrup, oil, and egg. Whisk until well-incorporated. Lightly grease a nonstick skillet with shortening and heat over medium heat. Pour or ladle the batter into the skillet, using 1/4 cup of batter for each pancake. Turn when bubbles form on the surface of the pancake. Cook until second side is brown.
Pin It Now!

Wednesday, May 2, 2012

Wine Exchange


wineexchange02wineexchange01
wineexchange03
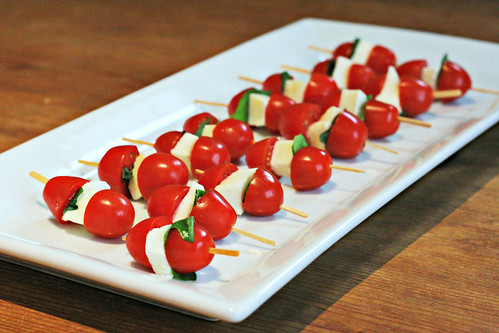
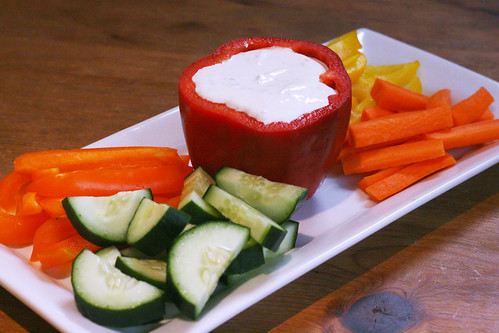
Caprese Bitesspinach basil pesto baked shrimpranch dip with vegetables
sweet tomato bisque114
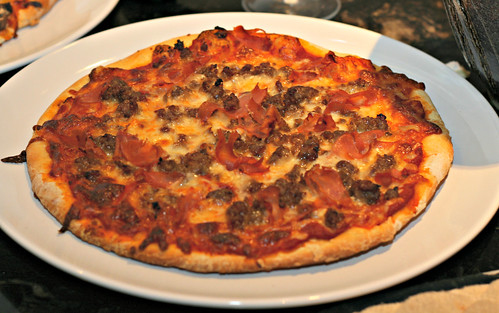
caramelized onion brie and spinach pizzaprosciutto and sausage pizza
mushrooms and peppers pizzaapricot brie & arugula pizza
wineexchange04
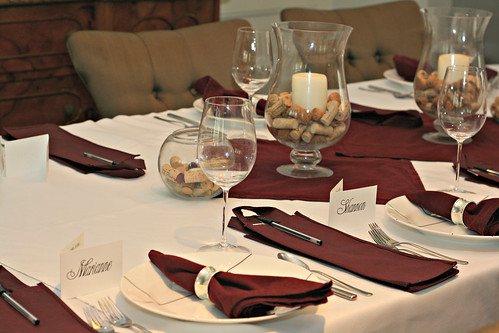
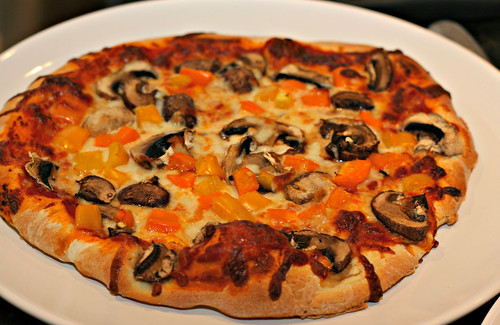
I hosted a wine exchange with my girlfriends while C was out of town with the MS150. Everyone was asked to bring two bottles of their favorite wine, one to sip and one to share. I provided reusable wine bags for each person to take home the wine the got in the exchange. We exchanged wines "white elephant" style, but there was no limit to the number of times a wine could be swapped. All the wines were fantastic, so there were no losers in the game. My friend Jen wanted to keep her wine so much, she decided to open it up mid game so we could all enjoy it and so that no one else could steal it. I kept the decorations simple, just vases filled with wine corks and candles. One each placecard there was a space to enter a guess as to how many wine corks were in all the vases, the guesses were all very close and we had three people tie guessing within three corks of the actual number (115!) The winner received a handy electric wine opener as a prize.  I kept the menu very casual. We started with Caprese bites, Pesto baked shrimp and vegetables with ranch dip, followed by the sweet tomato soup from the Secret Recipe Swap. I made six pizzas: caramelized onion, spinach & goat cheese; Prosciutto & sausage; mushrooms & peppers; artichokes & tomatoes; apricot, brie & arugula; and a "supreme" pizza with all the toppings. Dessert was a chocolate cake with strawberry cream cheese frosting. It was a lovely evening with my dearest friends.

Did you notice the absolutely adorable kitchen towels in the pictures?  They were a hostess gift from my talented friend Courtney.  She made them by tracing the header of my blog.  How cool is that!  They are too cute to ever use.
Pin It Now!

Tuesday, May 1, 2012

Viet-Cajun Dining in Houston, Texas

lacrawfish


When I moved to Texas to attend the University of Houston 13 long years ago, I never imagined it would become my permanent home, so much so that even my parents have moved here. The ideas I had in my head about Texas when I first arrived were your stereotypical cowboys and tumbleweeds. Boy was I in for a shock. Houston is a multicultural city that is lush with greenspace and has its fair share of modern skyscrapers. Whether you are looking to attend a performance at the opera or watch a cowboy rope at the rodeo, Houston has something for everyone.

What I have grown most to love about Houston, Texas is its rich culture of food. The food is so amazing here that the city offers Houston Culinary Tours led by some of the greatest Houston chefs in our city. The typical Texas cuisines of barbecue and Tex-Mex are well represented throughout our city, but you will also find amazing ethnic cuisines from around the country and the world. One of my favorite foods to eat this time of year is crawfish, traditionally from Texas’s neighbor to the east, Louisiana. Crawfish boils have crossed the border to Texas -- nice for me, as when I left Maryland I also left my beloved crab feasts. In recent years, more and more Vietnamese-style crawfish restaurants have popped up all around town. One of my favorite foods is Vietnamese and I am lucky to be in Houston, where there are many amazing Vietnamese restaurants, from fancy to casual.

Vietnamese crawfish definitely side on the casual side of dining. You have to be ready to get your hands dirty to enjoy them. My favorite spot is inside an Asian market, LA Crawfish. I go at least every other week during crawfish season, which typically runs from March to June. The crawfish are boiled and tossed with a spicy garlic butter sauce. This sauce has a very different flavor from a traditional Cajun boil -- it is less salty, much spicier. The crawfish (or mudbugs) are served in big plastic bags. I told you this was a casual place! They're served along with a roll of paper towels and a plastic sheet for your table. The Vietnamese crawfish restaurants in town usually get packed during crawfish season, so be prepared to share your space with equally eager crawfish eaters.

Once you have your bag of crawfish, there are several ways to eat them. I prefer them plain. The spicy garlic butter sauce that they are served in is flavorful enough for me. There are several condiments to choose from, such as butter, Sriracha and even mayonnaise. If I am dipping the tail meat in anything, it is fresh lime juice mixed with pepper. I grew up eating blue crab dipped in apple cider vinegar and Old bay, so the lime juice is a similar flavor. Crawfish are best washed down with an ice cold beer, which are available at the grocery store and LA Crawfish is BYOB. After you are stuffed full of crawfish, it is always fun to wander the aisles of the 99 Ranch Market. There are so many exotic foods to choose from and I have been able to find several harder to find Asian items there.
If you want to attempt to re-create Vietnamese-style crawfish at home, I recommend you invest in a turkey fryer. Crawfish are best cooked outdoors since they can get quite messy. Here is a copycat recipe for the crawfish and garlic butter sauce, if you have never tried crawfish this way, I highly recommend it. So when you visit Houston, Texas, be sure to sample some of our amazing restaurants and put Vietnamese-style crawfish at the top of your list.

$100 Visa Gift Card Giveaway

Travel Texas and BlogHer are sponsoring a great giveaway to one lucky reader. Please leave a comment telling me where you'd like to visit in Texas. You can request a free Texas Travel Guide from the TravelTex.com website where you can get lots of great ideas!
Rules:
No duplicate comments.
You may receive (2) total entries by selecting from the following entry methods:
a) Leave a comment in response to the sweepstakes prompt on this post
b) Tweet about this promotion and leave the URL to that tweet in a comment on this post
c) Blog about this promotion and leave the URL to that post in a comment on this post
d) For those with no Twitter or blog, read the official rules to learn about an alternate form of entry.
This giveaway is open to US Residents age 18 or older.
Winners will be selected via random draw, and will be notified by e-mail.
You have 72 hours to get back to me, otherwise a new winner will be selected.
The Official Rules are available here.
This sweepstakes runs from 5/1/2012-6/1/2012.
Be sure to visit the Discover Texas page on BlogHer.com where you can read about other bloggers' adventures and find more chances to win!
Pin It Now!
Related Posts Plugin for WordPress, Blogger...